NATS AWS Setup
💡 In the AWS Setup Section, you will be guided through creating a new EKS Cluster, connecting to it, starting a NATS Server, connecting to it, and finally creating a Network Load Balancer.
💡 In our setup, we first create an EKS cluster with three nodes which serve as the worker machines running NATS servers and handling incoming messages. The load balancer distributes incoming network traffic across the nodes, ensuring efficient utilization of resources. All of these terms will be defined below so feel free to come back to this text once you have more context to get a better understanding of the whole picture.
0. Configuring AWS Permissions
💡 Note: While configuring permissions during our own development of this pipeline, we chose to err on the side of over-permissiveness for users, in order to enable rapid development. However, to maintain a stable running version of the pipeline, it would be a good idea to reduce the permissions to only what is needed for security.
In general, a good way to manage allocating permissions to different AWS users is to create an IAM user group with the desired set of permissions, and then add users to the group as needed. The custom AWS-managed permissions we created are listed below and the configuration JSON files for them can be found in our repo here (under aws/permissions/*.json).
AWS-managed permissions:
- AmazonEC2FullAccess
- IAMFullAccess
- AmazonS3FullAccess
- IAMUserSSHKeys
- AmazonEC2ContainerRegistryPowerUser
- NetworkAdministrator
- AWSCloudFormationFullAccess
- AWSNetworkManagerFullAccess
- AdministratorAccess-Amplify
1. Creating a new EKS Cluster
⭐️ Key Terms:
- Containerized application: a software application that is packaged along with its dependencies, libraries, and configuration settings into a container, allowing it to run consistently and reliably across different computing environments.
- Kubernetes: an open-source system for automating the deployment, scaling, and management of containerized applications. (source) Basically, it takes care of building containerized applications as well as deploying and maintaining them.
💡 Amazon Elastic Kubernetes Service (Amazon EKS) is a managed service that you can use to run Kubernetes on AWS without needing to install, operate, and maintain your own Kubernetes control plane or nodes. Essentially, Amazon EKS simplifies managing Kubernetes and provides integration with AWS services. We are using EKS to create and handle a cluster of three EC2 nodes each running NATS servers to handle incoming messages to our data pipeline.
1) Prerequisites to Download
💡 Some of the following information was taken from: https://docs.aws.amazon.com/eks/latest/userguide/getting-started-eksctl.html
Eksctl

kubectl

AWS CLI
- aws cli installation: https://docs.aws.amazon.com/cli/latest/userguide/getting-started-install.html
curl "https://awscli.amazonaws.com/AWSCLIV2.pkg" -o "AWSCLIV2.pkg"sudo installer -pkg AWSCLIV2.pkg -target /
- aws cli installation: https://docs.aws.amazon.com/cli/latest/userguide/getting-started-install.html
helm
- If using macOS or Linux, you can use Homebrew (brew) to install:
brew install helm
- More instructions here on how to install
- If using macOS or Linux, you can use Homebrew (brew) to install:
2) Get Key
- Get Key
- In the AWS Console:
- Click your account name in the top right corner → select “Security Credentials” from the drop down menu
- Create a key for CLI access and download it under Access keys (for CLI, SDK, & API access)
- In the AWS Console:
3) Assume Role
- In your terminal, configure local AWS access key:
aws configureand enter in the prompted information
Create a text file called assume-eks-admin-role.txt with the following code
export $(printf "AWS_ACCESS_KEY_ID=%s AWS_SECRET_ACCESS_KEY=%s AWS_SESSION_TOKEN=%s" \
$(aws sts assume-role \
--role-arn arn:aws:iam::563060118978:role/eks-admin \
--role-session-name $USER \
--query "Credentials.[AccessKeyId,SecretAccessKey,SessionToken]" \
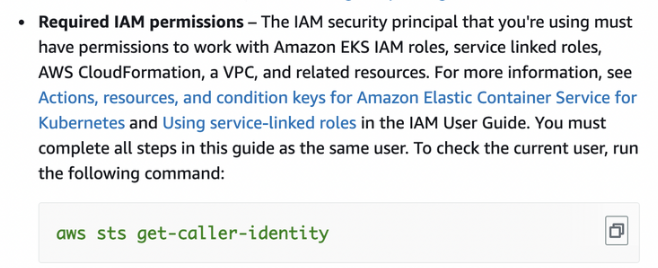
--output text))cat aws/assume-eks-admin-role.txtand copy/paste the command in the terminal- Note: if you are having permission issues revisit the Required IAM permissions section above. We had to add our username to IAM → Roles → eks_admin as a Trusted Entity
aws sts get-caller-identity- This should return “arn” = “…:assumed-role/eks-admin”
4) Create the cluster in command line
# Create 3 node Kubernetes cluster
export YOUR_EKS_NAME = <insert your eks cluster name here> # ours is data-pipeline-small-test

eksctl create cluster --name $YOUR_EKS_NAME \
  --nodes 3 \
  --node-type=t3.small \
  --region=us-west-2

# Get the credentials for your cluster
eksctl utils write-kubeconfig --name $YOUR_EKS_NAME --region eu-west-1
💡 We will test this step in step 5 since we need the load balancer (step 4) for testing purposes.
2. Connecting to the new EKS Cluster
cat aws/assume-eks-admin-role.txtand copy/paste the command in the terminalaws eks update-kubeconfig -—region us-west-2 -—name $YOUR_EKS_NAME- ex:
aws eks update-kubeconfig --region us-west-2 --name data-pipeline-small-test - This connects us to the kubernetes cluster we created
- ex:
kubectl get nodes— see the nodes in our newly created cluster- example output:

3. Starting the NATS Server
⭐️ Key Terms:
- NATS is an open-source, high-performance messaging system that provides publish-subscribe and request-reply messaging patterns. NATS can help you to build a distributed system that is scalable, flexible, resilient, and performant, making it a popular choice for cloud-native architectures and microservices-based applications (Chat GPT).
💡 In the following steps, we will deploy NATS into our EKS cluster. In other words, we will be deploying an instance of the NATS messaging system as a containerized application within the cluster environment. By deploying NATS as a container within a cluster, we can easily scale the number of NATS instances based on the messaging workload, and ultimately have a resilient messaging infrastructure backbone to integrate with other applications in our data pipeline.
💡 In the deployment manifest, we have already specified the desired number of replicas for the NATS Box deployment to be 3 to match the number of nodes in our cluster and ensure that there is one NATS Box container running on each node.
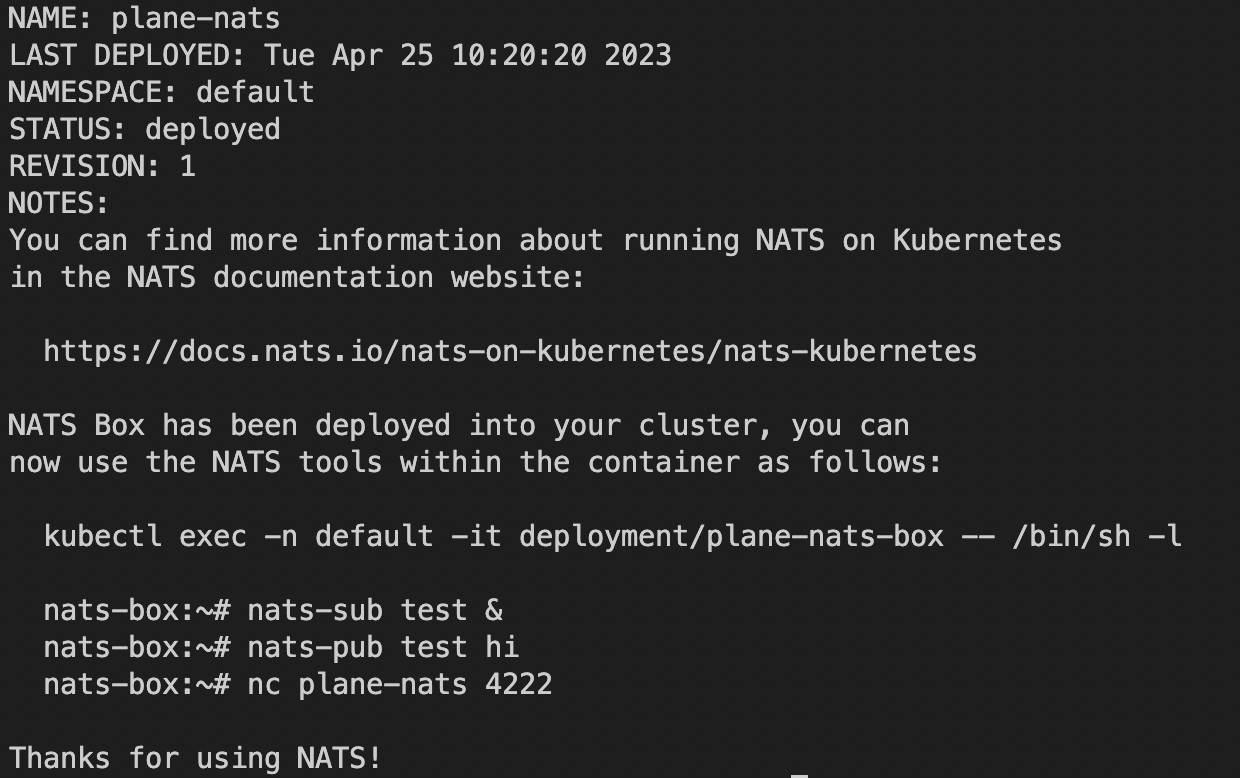
cat aws/assume-eks-admin-role.txtand copy/paste the command in the terminalhelm install
define your TOKEN variable (you will continue to use this often)
sudo -E helm install plane-nats nats/nats -f config/k8s-values.yml --set auth.token=$TOKENexample output:
Debugging Help
- If you encounter issues, try
helm repo updateandhelm repo list - The default config of nats can be seen in https://artifacthub.io/packages/helm/nats/nats
- a possibly helpful reference: https://dev.to/karanpratapsingh/nats-with-kubernetes-3bmc
- If you encounter issues, try
Deleting Nats Server (only if you need to delete/restart it at some point)
kubectl get servicesif removing any: use the script
cleanup-k8s.shfrom the repo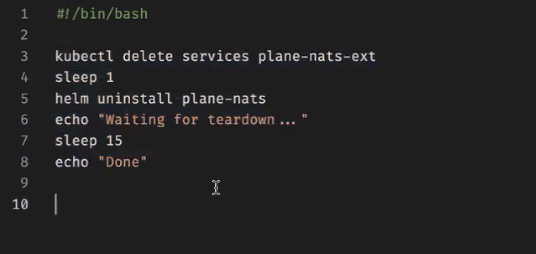
kubectl apply -f ./server/config/nats-service.yml- should see service
plant-natscreated when you dokubectl get svc

- no
sudoin this command!
- should see service
4. Creating a Network Load Balancer
⭐️ Key Terms:
- A Network Load Balancer (NLB) is a type of load balancer provided by AWS that operates at the network layer and is used to distribute incoming network traffic across multiple targets, such as EC2 instances, containers, or IP addresses, in order to improve availability, scalability, and performance of your applications or services.
💡 We need a network load balancer to balance the workload between our three nodes in EKS.
*Some of the following information was taken from this link
One-line installer creates a secure cluster named 'nats’
- Run the following:
curl -sSL https://raw.githubusercontent.com/nats-io/k8s/master/setup.sh | sh
- Run the following:
Create AWS Network Load Balancer service
echo '
apiVersion: v1
kind: Service
metadata:
  name: nats-nlb
  namespace: default
  labels:
    app: nats
  annotations:
    service.beta.kubernetes.io/aws-load-balancer-type: "nlb"
spec:
  type: LoadBalancer
  externalTrafficPolicy: Local
  ports:
  - name: nats
    port: 4222
    protocol: TCP
    targetPort: 4222
  selector:
    app.kubernetes.io/name: nats
' | kubectl apply -f -
Check that it worked
Run the following:
kubectl get svc nats-nlb -o wideThe output should look like:
NAME       TYPE           CLUSTER-IP      EXTERNAL-IP                                                                     PORT(S)          AGE    SELECTOR
nats-nlb   LoadBalancer   10.100.67.123   a18b60a948fc611eaa7840286c60df32-9e96a2af4b5675ec.elb.us-east-2.amazonaws.com   4222:30297/TCP   151m   app=nats
test connection to the load balancer endpoint (check if port is open from our side) with:
netcat -zv [EXTERNAL-IP] 4222
5. Test Sending & Receiving Messages
💡 Now let’s test and see if we can send and receive messages by using the load balancer endpoint that acts as the “gateway” to our EKS cluster and will handle distributing incoming messages between the NATS servers running within each of the three EC2 nodes in our cluster.
Create a NATS context: In our case, we have a load balancer in front of the NATS servers. Therefore we will point the NATS context to the load balancer's address so the load balancer can then act as a proxy, distributing the incoming NATS requests to the appropriate NATS server based on its load balancing algorithm.
- “The
natsCLI supports multiple named configurations. We refer to these configurations as “context”. In these contexts, we can configure the server, credentials, certs, and much more.” Check out this link for more information (Context section) $CONTEXT-NAME=<pick a name for your context>nats context save CONTEXT-NAME --server=nats://[TOKEN]@[EXTERNAL-IP]:4222(insert your TOKEN and nlb external IP values into the command)- ex:
nats context save my-context --server=nats://token@a82c025f6da29437cb87d53a7c616262-b7af42cbc4ec8f0a.elb.us-west-2.amazonaws.com:4222
- ex:
nats context select CONTEXT-NAME
- “The
Test: Subscribe in one terminal window, Publish a test message in another. After publishing you should be able to see the published message in the subscribed terminal window.
subscribe:
If you’ve already set & selected your NATS context simply use the command:
nats sub ">"Otherwise:
- full command format:
nats sub -s nats://[TOKEN]@[EXTERNAL-IP]:4222 ">"(insert your TOKEN and nlb external IP values into the command) - ex:
nats sub -s nats://token@a82c025f6da29437cb87d53a7c616262-b7af42cbc4ec8f0a.elb.us-west-2.amazonaws.com:4222 “>”
- full command format:
you should see something like the following as output: (note: message will be received after also doing the pub step below)
# output before publish step (subscribe confirmation)
18:18:38 Subscribing on >

# after publish step below (received message)
18:18:38 Subscribing on >
[#1] Received on "test.foo"
>bar
pub:
If you’ve already set & selected your NATS context simply use the command:
nats pub test.foo ">bar"
Otherwise:
- command format:
nats pub -s nats://[TOKEN]@[EXTERNAL-IP]:4222 test.foo ">bar" - ex:
nats pub -s nats://token@a82c025f6da29437cb87d53a7c616262-b7af42cbc4ec8f0a.elb.us-west-2.amazonaws.com:4222 test.foo ">bar"
- command format:
you should see something like the following as output:
18:19:59 Published 4 bytes to "test.foo"
6. Upgrading an Existing Cluster
💡 AWS requires EKS clusters to remain within a few minor versions of the current stable release for Kubernetes. Any deployment of this spectrum pipeline with an uptime of weeks or more can expect to have to go through this upgrade process. You can find more information about the upgrade process in the eksctl documentation or AWS documentation.
- Ensure you have the correct credentials for
eksctlby runningeksctl get clustersand verifying that your cluster is visible. Otherwise, use the assume role command from Section 3.1 and try again. - Update the control plane: EKS requires the control plane to be updated one minor version at a time, so you may have to complete this and the following steps multiple times to reach the current stable release. To update the control plane, run
eksctl upgrade cluster <your cluster>to view the proposed upgrade.eksctl upgrade cluster --approve <your cluster>to execute the upgrade.
- Update the nodegroup: Each nodegroup must be upgraded separately, and kept within two minor versions of the control plane. The nodegroups can be updated from the AWS console in your browser, but documentation suggests this may interfere with more complicated deployments. The suggested method is to add a new nodegroup, then delete the old one and allow pods to migrate to the new nodegroup over time. To do this, run
eksctl create nodegroup --cluster <your cluster> --nodes 3 --node-type t3.small --region us-west-2eksctl get nodegroup --cluster <your cluster>will list existing nodegroups. Note down the name of the older nodegroup which we will now delete.eksctl delete nodegroup --cluster <your cluster> --name <old group name>- The delete command may take a long time to complete. You can check on the status of pods and nodes with
kubectl get pods -o widekubectl get nodes -o wide
- Update default addons: There are three default addons included in any
eksctl-managed cluster which must also be updated. To upgrade them, runeksctl utils update-kube-proxy --cluster <your cluster> --approveeksctl utils update-aws-node --cluster <your cluster> --approveeksctl utils update-coredns --cluster <your cluster> --approve
💡 Great Job! We have now created the backbone for our pipeline. When there are NATS communication requests the load balancer will act as a proxy, distributing the incoming NATS requests to the appropriate NATS server based on its load balancing algorithm in the corresponding node with the EKS cluster. We now have a scalable and resilient NATS messaging infrastructure that is ready to be integrated with other applications or services across our data pipeline. In the next step we will set up the Client component which will feed data into our pipeline.
🐞 Debugging Help: https://docs.nats.io/running-a-nats-service/configuration/clustering/jetstream_clustering/troubleshooting