NATS Setup
1. Creating a new EKS Cluster
💡 Amazon Elastic Kubernetes Service (Amazon EKS) is a managed service that you can use to run Kubernetes on AWS without needing to install, operate, and maintain your own Kubernetes control plane or nodes. Kubernetes is an open-source system for automating the deployment, scaling, and management of containerized applications. (source)
1) Prerequisites to Download
- Eksctl

- kubectl

- AWS CLI
- aws cli installation: https://docs.aws.amazon.com/cli/latest/userguide/getting-started-install.html
curl "[https://awscli.amazonaws.com/AWSCLIV2.pkg](https://awscli.amazonaws.com/AWSCLIV2.pkg)" -o "AWSCLIV2.pkg"sudo installer -pkg AWSCLIV2.pkg -target /
- aws cli installation: https://docs.aws.amazon.com/cli/latest/userguide/getting-started-install.html
2) Get Key
- Get Key
- In the AWS Console:
- Click your account name in the top right corner → select “Security Credentials” from the drop down menu
- Create a key for CLI access and download it under Access keys (for CLI, SDK, & API access)
- In the AWS Console:
3) Assume Role
- In your terminal, configure local AWS access key:
aws configureand enter in the prompted information
- Create a text file called assume-eks-admin-role.txt with the following code
export $(printf "AWS_ACCESS_KEY_ID=%s AWS_SECRET_ACCESS_KEY=%s AWS_SESSION_TOKEN=%s" \
$(aws sts assume-role \
--role-arn arn:aws:iam::563060118978:role/eks-admin \
--role-session-name $USER \
--query "Credentials.[AccessKeyId,SecretAccessKey,SessionToken]" \
--output text))
cat aws/assume-eks-admin-role.txtand copy/paste the command in the terminal- Note: if you are having permission issues revisit the Required IAM permissions section above. We had to add our username to IAM → Roles → eks_admin as a Trusted Entity
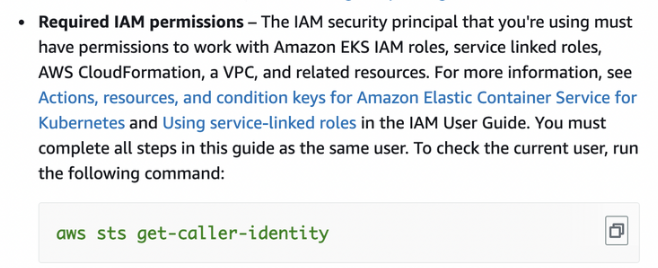
aws sts get-caller-identity- This should return “arn” = “…:assumed-role/eks-admin”
4) Create the cluster in command line
# Create 3 node Kubernetes cluster
export YOUR_EKS_NAME = <insert your eks cluster name here> # ours is data-pipeline-small-test

eksctl create cluster --name $YOUR_EKS_NAME \
  --nodes 3 \
  --node-type=t3.small \
  --region=us-west-2

# Get the credentials for your cluster
eksctl utils write-kubeconfig --name $YOUR_EKS_NAME --region eu-west-1
2. Connecting to the new EKS Cluster
cat aws/assume-eks-admin-role.txtand copy/paste the command in the terminalaws eks update-kubeconfig -—region us-west-2 -—name $YOUR_EKS_NAME- ex:
aws eks update-kubeconfig --region us-west-2 --name data-pipeline-small-test - This connects us to the kubernetes cluster we created
- ex:
kubectl get nodes— see the nodes in our newly created cluster- example output:

3. Starting the NATS Server
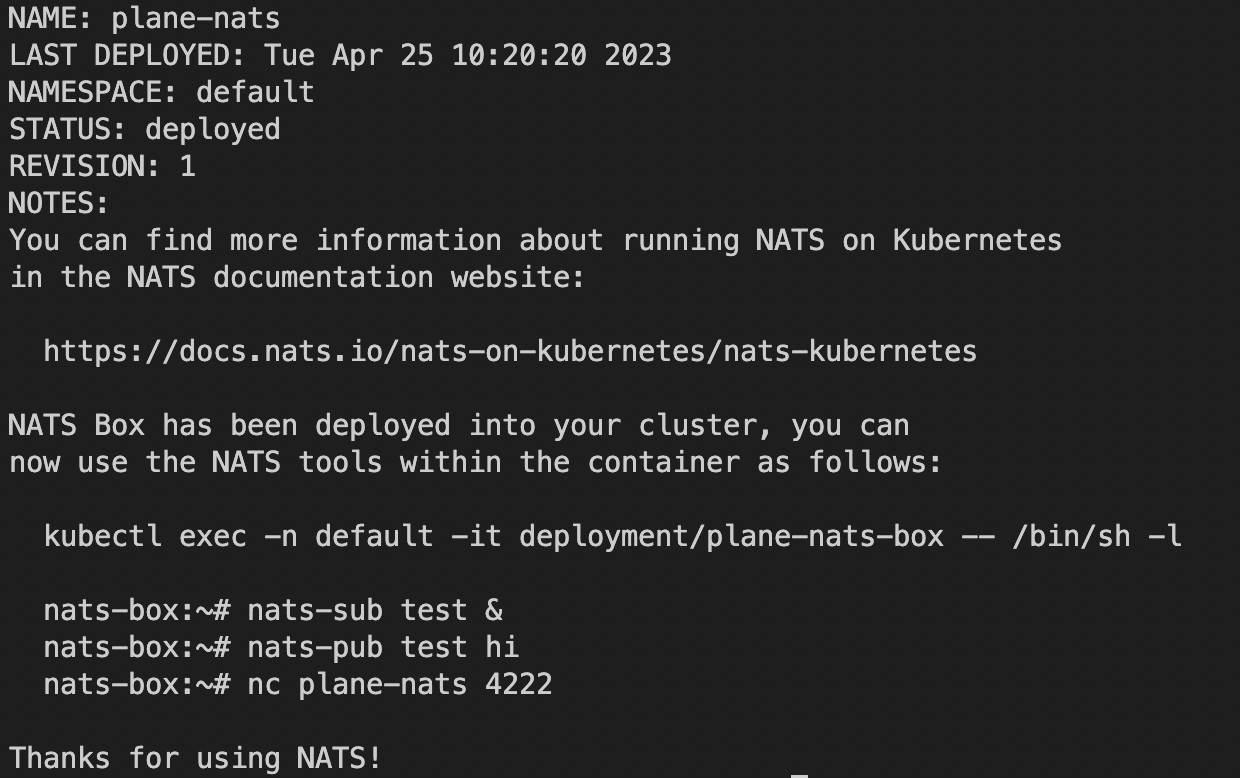
cat aws/assume-eks-admin-role.txtand copy/paste the command in the terminalhelm install
- define your TOKEN variable (you will continue to use this often)
sudo -E helm install plane-nats nats/nats -f config/k8s-values.yml --set auth.token=$TOKEN- example output:
- Debugging Help
- If you encounter issues, try
helm repo updateandhelm repo list - The default config of nats can be seen in https://artifacthub.io/packages/helm/nats/nats
- a possibly helpful reference: https://dev.to/karanpratapsingh/nats-with-kubernetes-3bmc
- If you encounter issues, try
- Deleting Nats Server (only if you need to delete/restart it at some point)
kubectl get services- if removing any: use the script
cleanup-k8s.shfrom the repo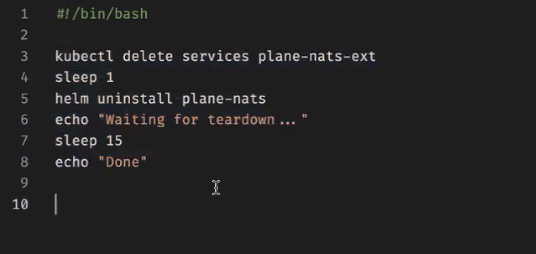
kubectl apply -f ./server/config/nats-service.yml- should see service
plant-natscreated when you dokubectl get svc

- no
sudoin this command!
- should see service
4. Creating a Network Load Balancer
*Some of the following information was taken from this link
One-line installer creates a secure cluster named 'nats’
- Run the following:
curl -sSL [https://raw.githubusercontent.com/nats-io/k8s/master/setup.sh](https://raw.githubusercontent.com/nats-io/k8s/master/setup.sh) | sh
- Run the following:
Create AWS Network Load Balancer service
echo '
apiVersion: v1
kind: Service
metadata:
  name: nats-nlb
  namespace: default
  labels:
    app: nats
  annotations:
    service.beta.kubernetes.io/aws-load-balancer-type: "nlb"
spec:
  type: LoadBalancer
  externalTrafficPolicy: Local
  ports:
  - name: nats
    port: 4222
    protocol: TCP
    targetPort: 4222
  selector:
    app.kubernetes.io/name: nats
' | kubectl apply -f -
Check that it worked
- Run the following:
kubectl get svc nats-nlb -o wide- The output should look like:
NAME       TYPE           CLUSTER-IP      EXTERNAL-IP                                                                     PORT(S)          AGE    SELECTOR
nats-nlb   LoadBalancer   10.100.67.123   a18b60a948fc611eaa7840286c60df32-9e96a2af4b5675ec.elb.us-east-2.amazonaws.com   4222:30297/TCP   151m   app=nats
- The output should look like:
- test connection to the load balancer endpoint (check if port is open from our side) with:
netcat -zv [EXTERNAL-IP] 4222
- Run the following:
5. Test Sending & Receiving Messages
Create a NATS context
- “The
natsCLI supports multiple named configurations. We refer to these configurations as “context”. In these contexts, we can configure the server, credentials, certs, and much more.” Check out this link for more information (Context section) nats context save **[CONTEXT-NAME]** --server=nats://**[TOKEN]@[EXTERNAL-IP]:4222**- ex:
nats context save my-context --server=nats://token@a82c025f6da29437cb87d53a7c616262-b7af42cbc4ec8f0a.elb.us-west-2.amazonaws.com:4222
- ex:
nats context select **[CONTEXT-NAME]**
- “The
Test out publishing a test message and subscribing to receive that message
- subscribe:
- command format:
nats sub -s **nats://[TOKEN]@[EXTERNAL-IP]:4222** ">"****(we use token to do authentication so we need this format) - ex:
nats sub -s nats://token@[a82c025f6da29437cb87d53a7c616262-b7af42cbc4ec8f0a.elb.us-west-2.amazonaws.com](http://a82c025f6da29437cb87d53a7c616262-b7af42cbc4ec8f0a.elb.us-west-2.amazonaws.com/):4222 “>” - or if you’ve already set & selected your NATS context simply use the command:
nats sub ">" - you should see something like the following as output: *(note: message will be received after also doing the pub step below)*
18:18:38 Subscribing on >
[#1] Received on "test.foo"
>bar
- command format:
- subscribe:
pub:
- ex:
nats pub -s nats://token@[a82c025f6da29437cb87d53a7c616262-b7af42cbc4ec8f0a.elb.us-west-2.amazonaws.com](http://a82c025f6da29437cb87d53a7c616262-b7af42cbc4ec8f0a.elb.us-west-2.amazonaws.com/):4222 test.foo ">bar" - or if you’ve already set & selected your NATS context simply use the command:
nats pub ">" - you should see something like the following as output:
18:19:59 Published 4 bytes to "test.foo"
- ex:
🐞 Debugging Help: https://docs.nats.io/running-a-nats-service/configuration/clustering/jetstream_clustering/troubleshooting