Instructions to Run the Containerized Client
Now that we have the backbone of the pipeline set up it is ready to start accepting data. Set up the Client program component in the pipeline, which is responsible for reading raw spectrum data packets from a radio device, and unpacking/processing them into a more human-readable format. The client program is highly customizable to your own application. In the case of our airplane tracker application, it specifically processes ADS-B packets using the dump1090 software which decodes the data into a more human-readable format, in this case a JSON file.
SDR Hardware Setup
The following instructions to run the containerized client can be utilized by anyone with their own Software Defined Radios to collect broadcasted data in their geographical location and input this data into your pipeline. For our example airplane tracker, we had an associate in Colorado follow these instructions and as a result are able to see the planes in Colorado as well as our own location on our final airplane tracker web application.
The Software Defined Radio will be collecting data in real-time to create an application that is using real-time data constantly, the Software Defined Radio needs to be connected to a device and the client program needs to be running in order for it to do so. This device could be a personal laptop or a Raspberry Pi. Lets start with using your laptop for simple, easy-to-test set up of the client program. Later on, if you have access to a Raspberry Pi or other computing device you would prefer to run the client on, you can follow our instructions to install Docker on a Raspberry Pi and then these same instructions to get it set up there.
Running the Containerized Client
The following steps will guide you through the process of downloading the airplane client program from our repo, as well as containerizing it and keeping it continuously running. This reads in the raw spectrum data packets from the radio device, and unpacks/processes them into a more human-readable format, and finally publishes these back to the data pipeline for further processing by downstream components.
clone the repo:
gh repo clone ml4wireless/adsb-natscd into the
client-rtl-dockerfolderRun
makein command line to build the Docker imageConnect the SDR device
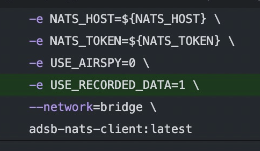
In the script
run-docker.sh- for
NATS_TOKEN, insert the NATS authentication token you set during the AWS setup phase of the tutorial - for
REPORTER_UID, insert your name or desired reporting user id for your client- this will show up on the frontend to help identify which airplane data points your device has reported
- for
Create a screen session to use to keep the program executing in the background with
screen -S <session_name>Use the script
[run-docker.sh](http://run-docker.sh)we created earlier to start the execution of the container:Note: If it is your first time running the script, run
chmod +x [run-docker.sh](http://run-docker.sh)to make it executable./run-docker.sh
Detach the Screen session (keeps the program running in the background even if you exit the terminal)
- press
ctrl + a + dto detach it -> you are now done (you may have to try doing this multiple times for it to work) - Optional Check: To make sure the screen session was created and detached, use the command
screen -list. You should see something like this, with your session name-
- press
Debugging Help 🐞
We have added a environment variable USE_RECORDED_DATA in run_docker.sh for debugging purposes. Set it to 1 in order to use pre-recorded data instead of live data.
Verify that it’s Working
Method 1: Command Line NATS
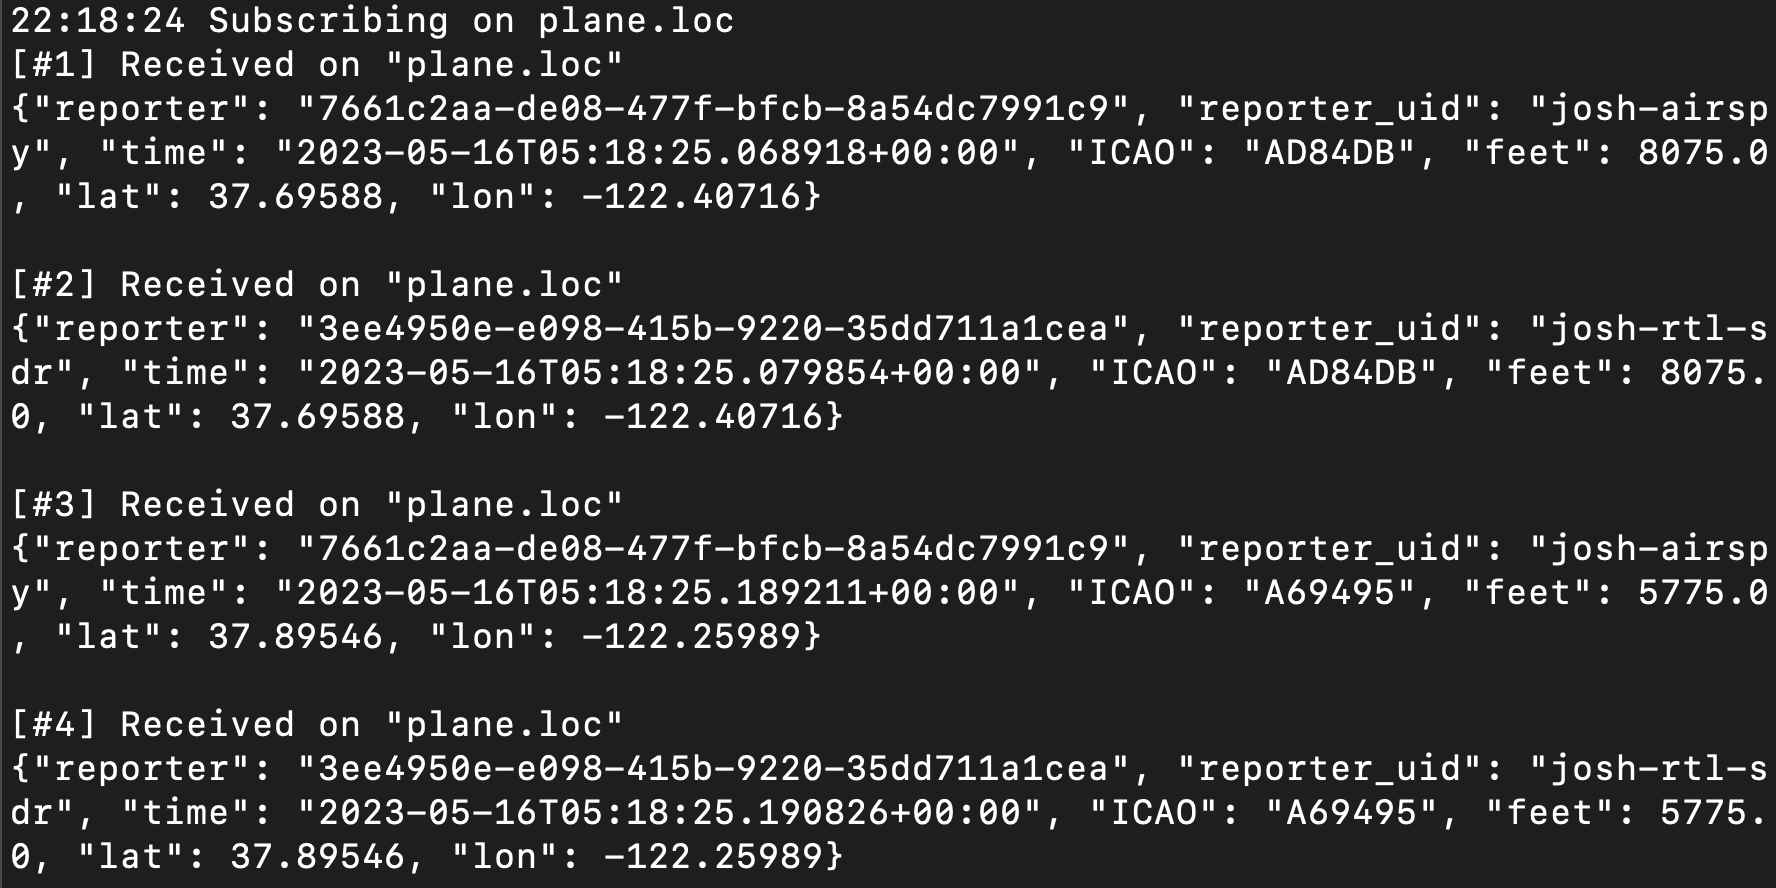
nats sub -s nats://<TOKEN>@a15d11836d0644f6da0d09cbd81fae4f-949e37ea0352e6ad.elb.us-west-2.amazonaws.com:4222 "plane.loc"

# where you insert the NATS authentication TOKEN and the name of the stream to which the client program is publishing data ("plane.loc" in our case)
In the output of the command, you should be able to read messages containing the sensed spectrum plane data which were published by the client program, as shown in the example below:
Method 2: Using the Frontend
💡 Only if the Frontend component has already been built out. Otherwise please use Method 1 for verification.
Please refer to the Frontend part for building the application to test your client program.
Using our Frontend Airplane Tracker Visualization
General Instructions:
- Visit the frontend page: https://tinyurl.com/specpipe
- You can choose to allow your browser to see your location, and then the map should center around your location. Otherwise, the map will center around Berkeley, CA by default.
- Every airplane dot/marker on the map represents a logged location at a certain time, with a trail of the same color markers representing a single plane.
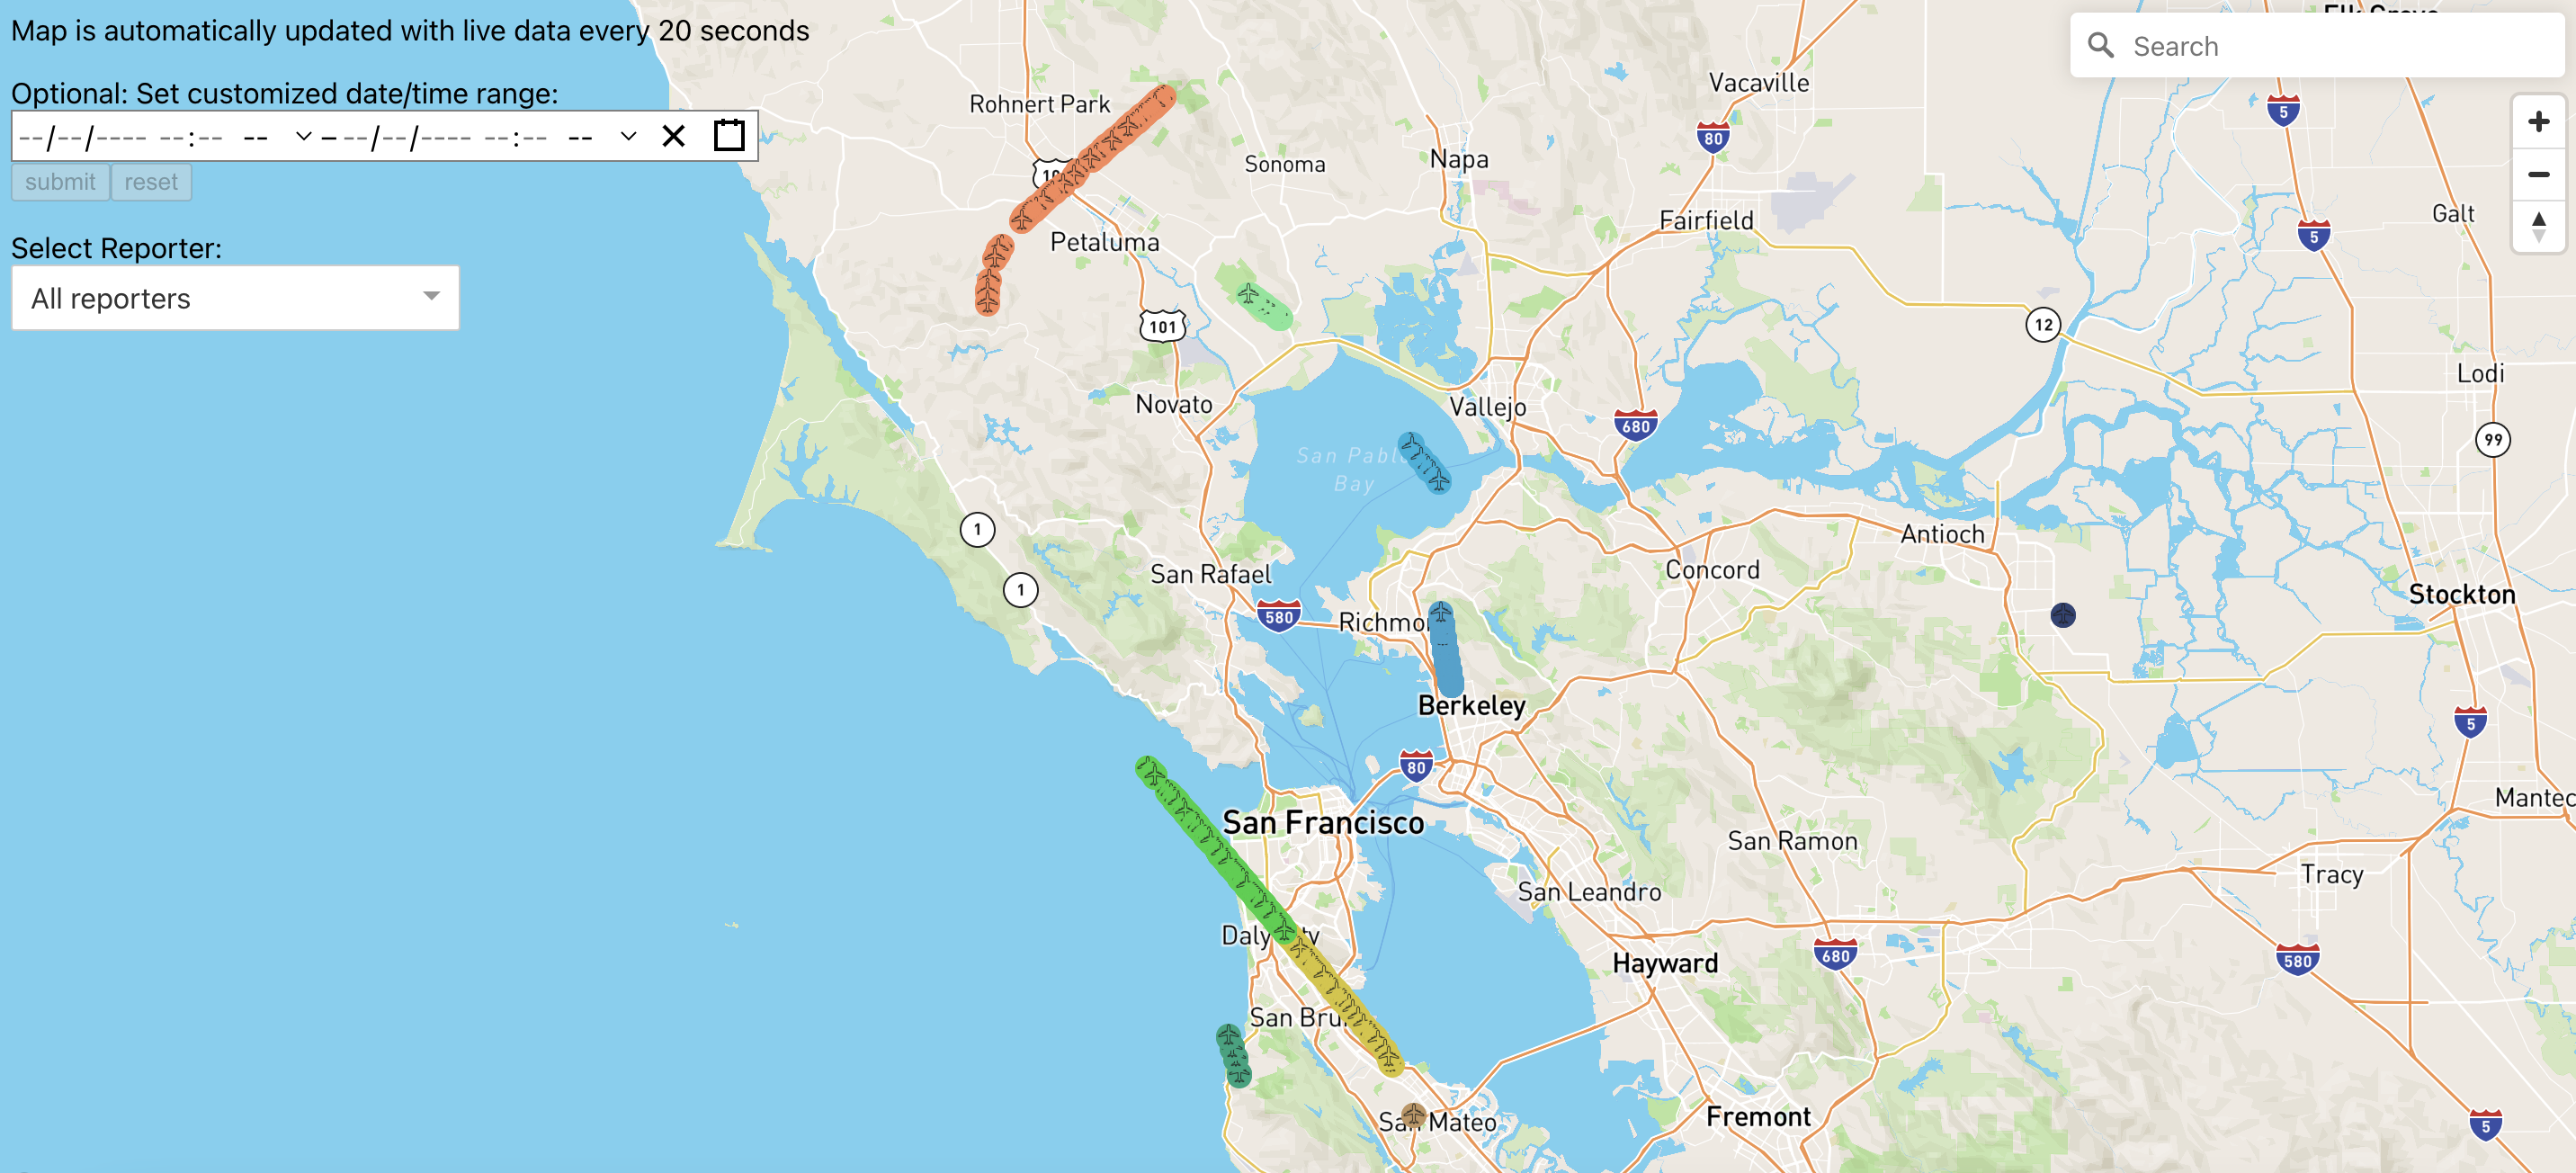
- The Airplane Tracker application updates the map in real time with new airplane data every 20 seconds. The application cleans parts of the data when the number of markers is over a certain limit.
- To test:
Wait and watch for current data points to show up
Should look like the image below after some time has passed
The application also provides additional functionalities.
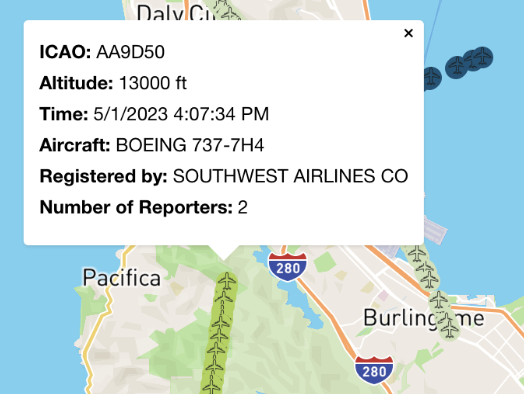
Feature 1: Airplane Marker Popup
As you click on any marker on the map in the Airplane Tracker application, a popup will display additional information such as the airplane’s ICAO number, altitude, time of location broadcast, the aircraft type, etc., as can be seen in the image below.
Feature 2: Search Markers based on Time Intervals
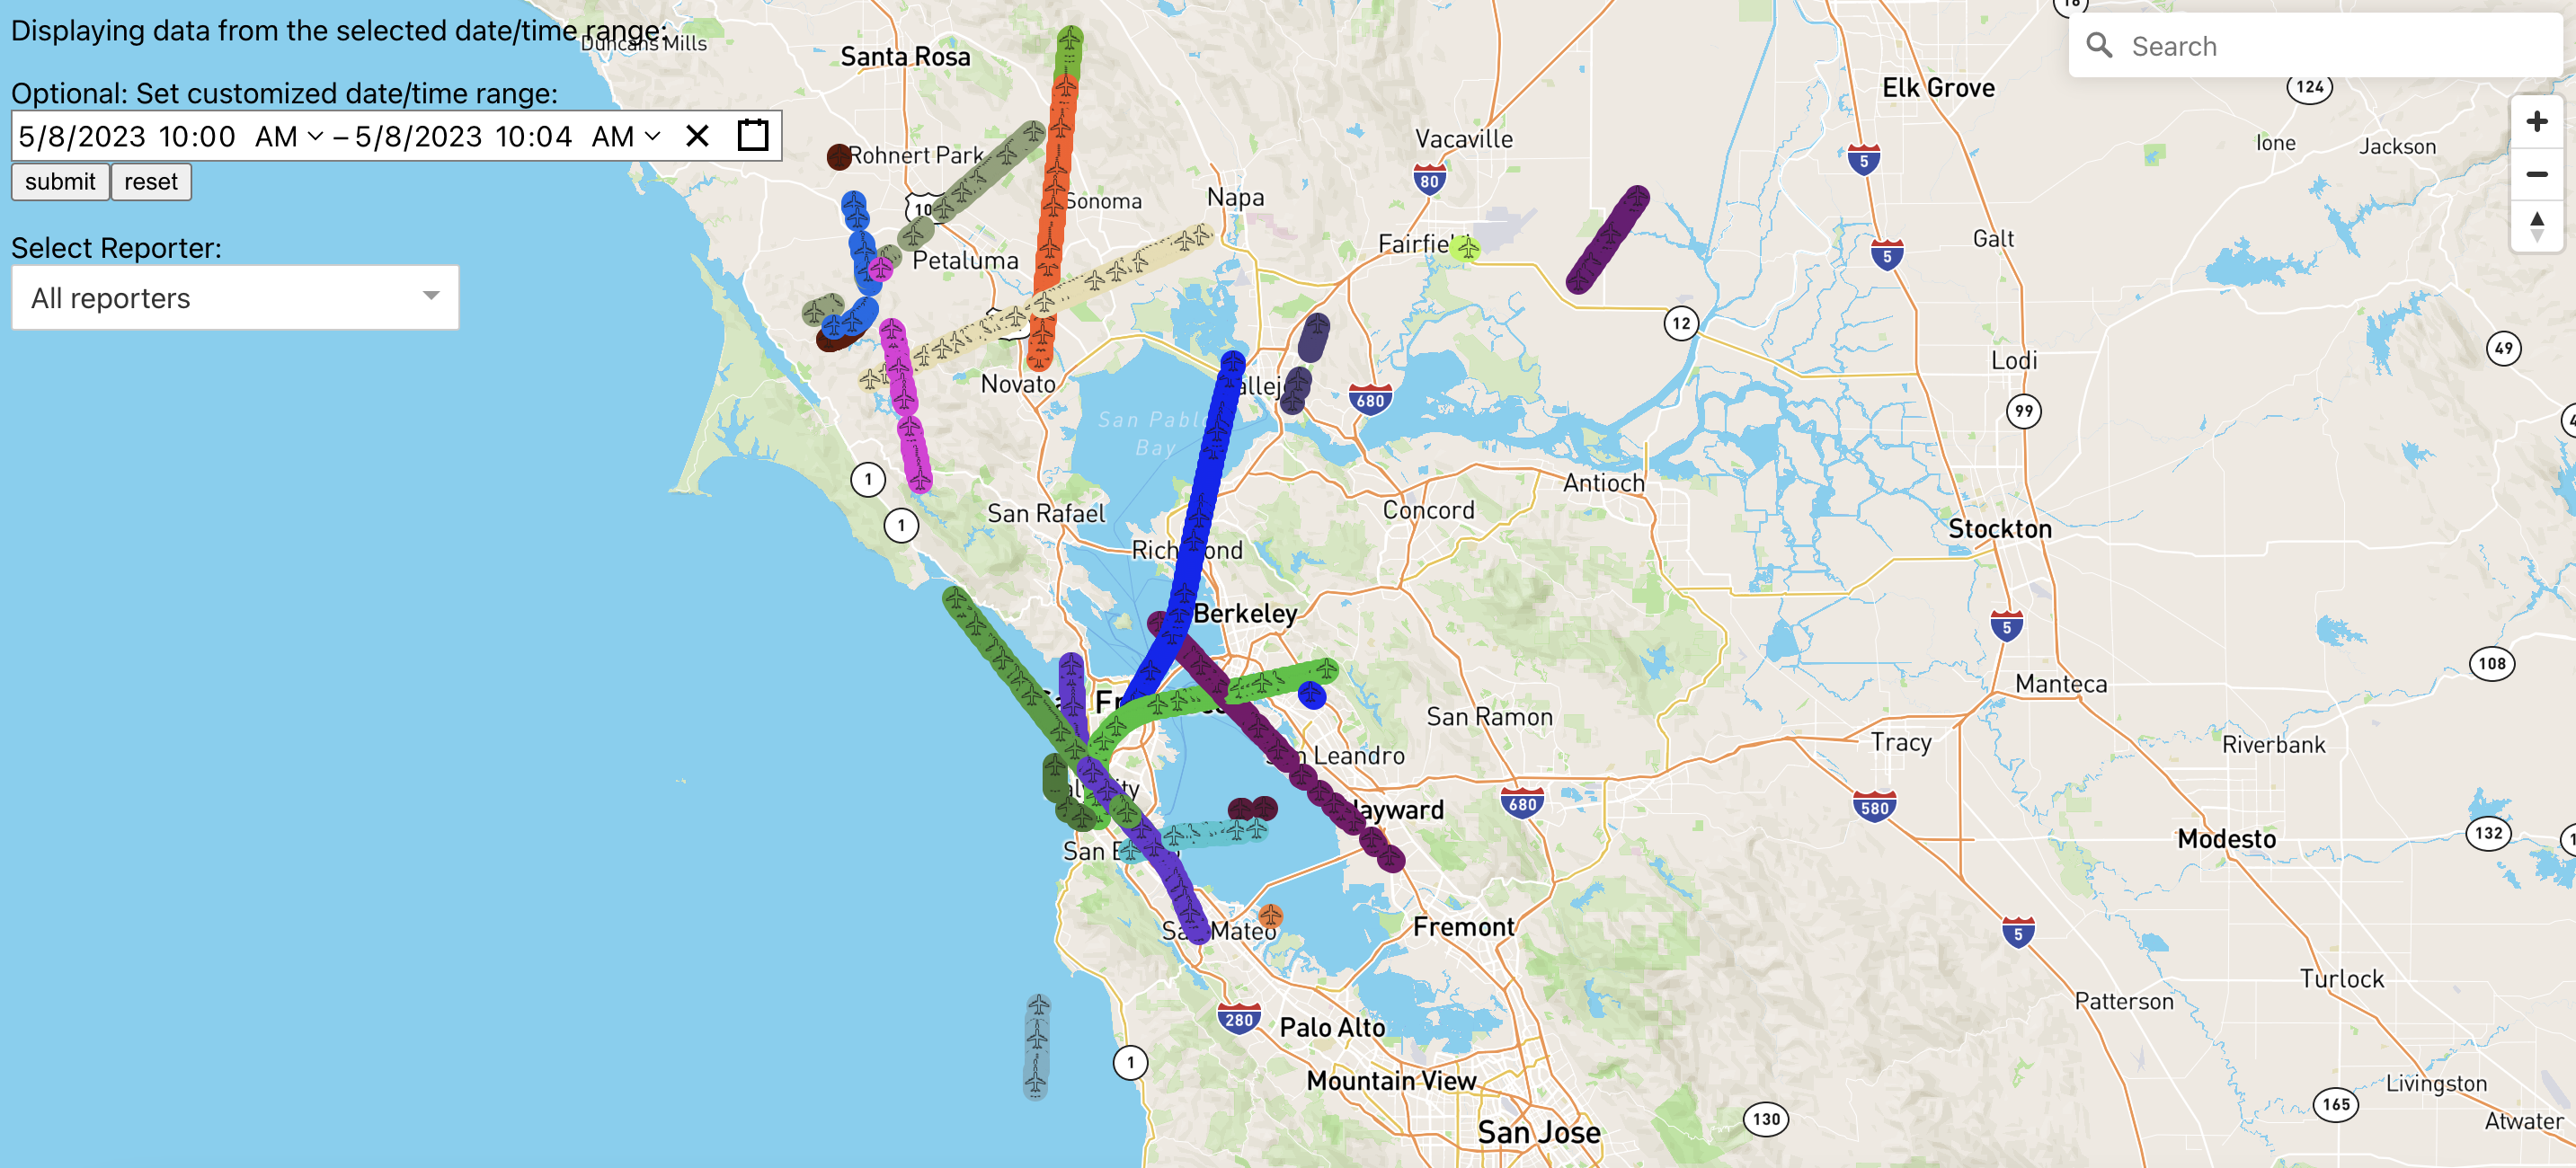
- There is an option to select a desired interval and see the plane trajectories during that time range using the calendar tool in the top-left corner of the application.
- In the image shown below, we specified the start time to be 10:00 am on May 8, 2023 and the end time to be 10:04 am on May 8, 2023.
- Make sure to select a max time range of 4 minutes to prevent too many airplane markers
Feature 3: Filter Markers by Reporter
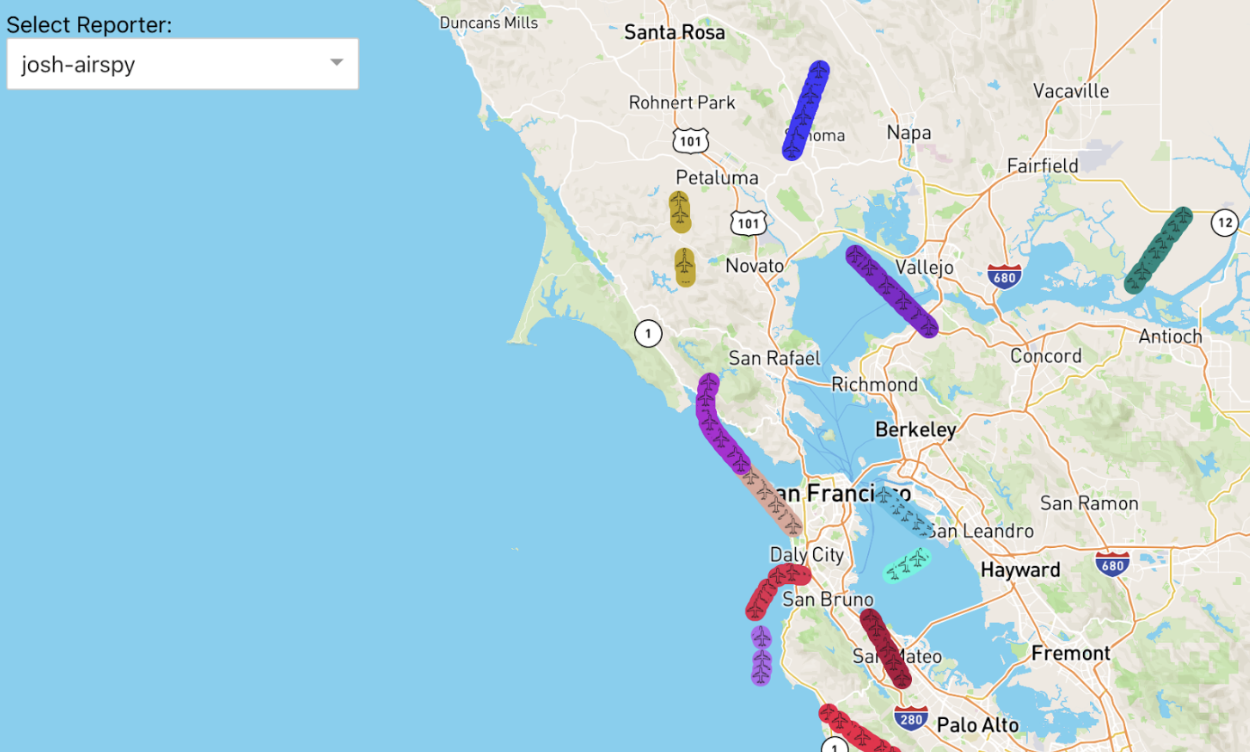
- To distinguish between different reporters, the Airplane Tracker application has a “filter by reporter” functionality using the “Select Reporter” dropdown in the left corner of the application.
- Select a specific reporter under the dropdown, and the application only shows the airplane markers with this reporter type.
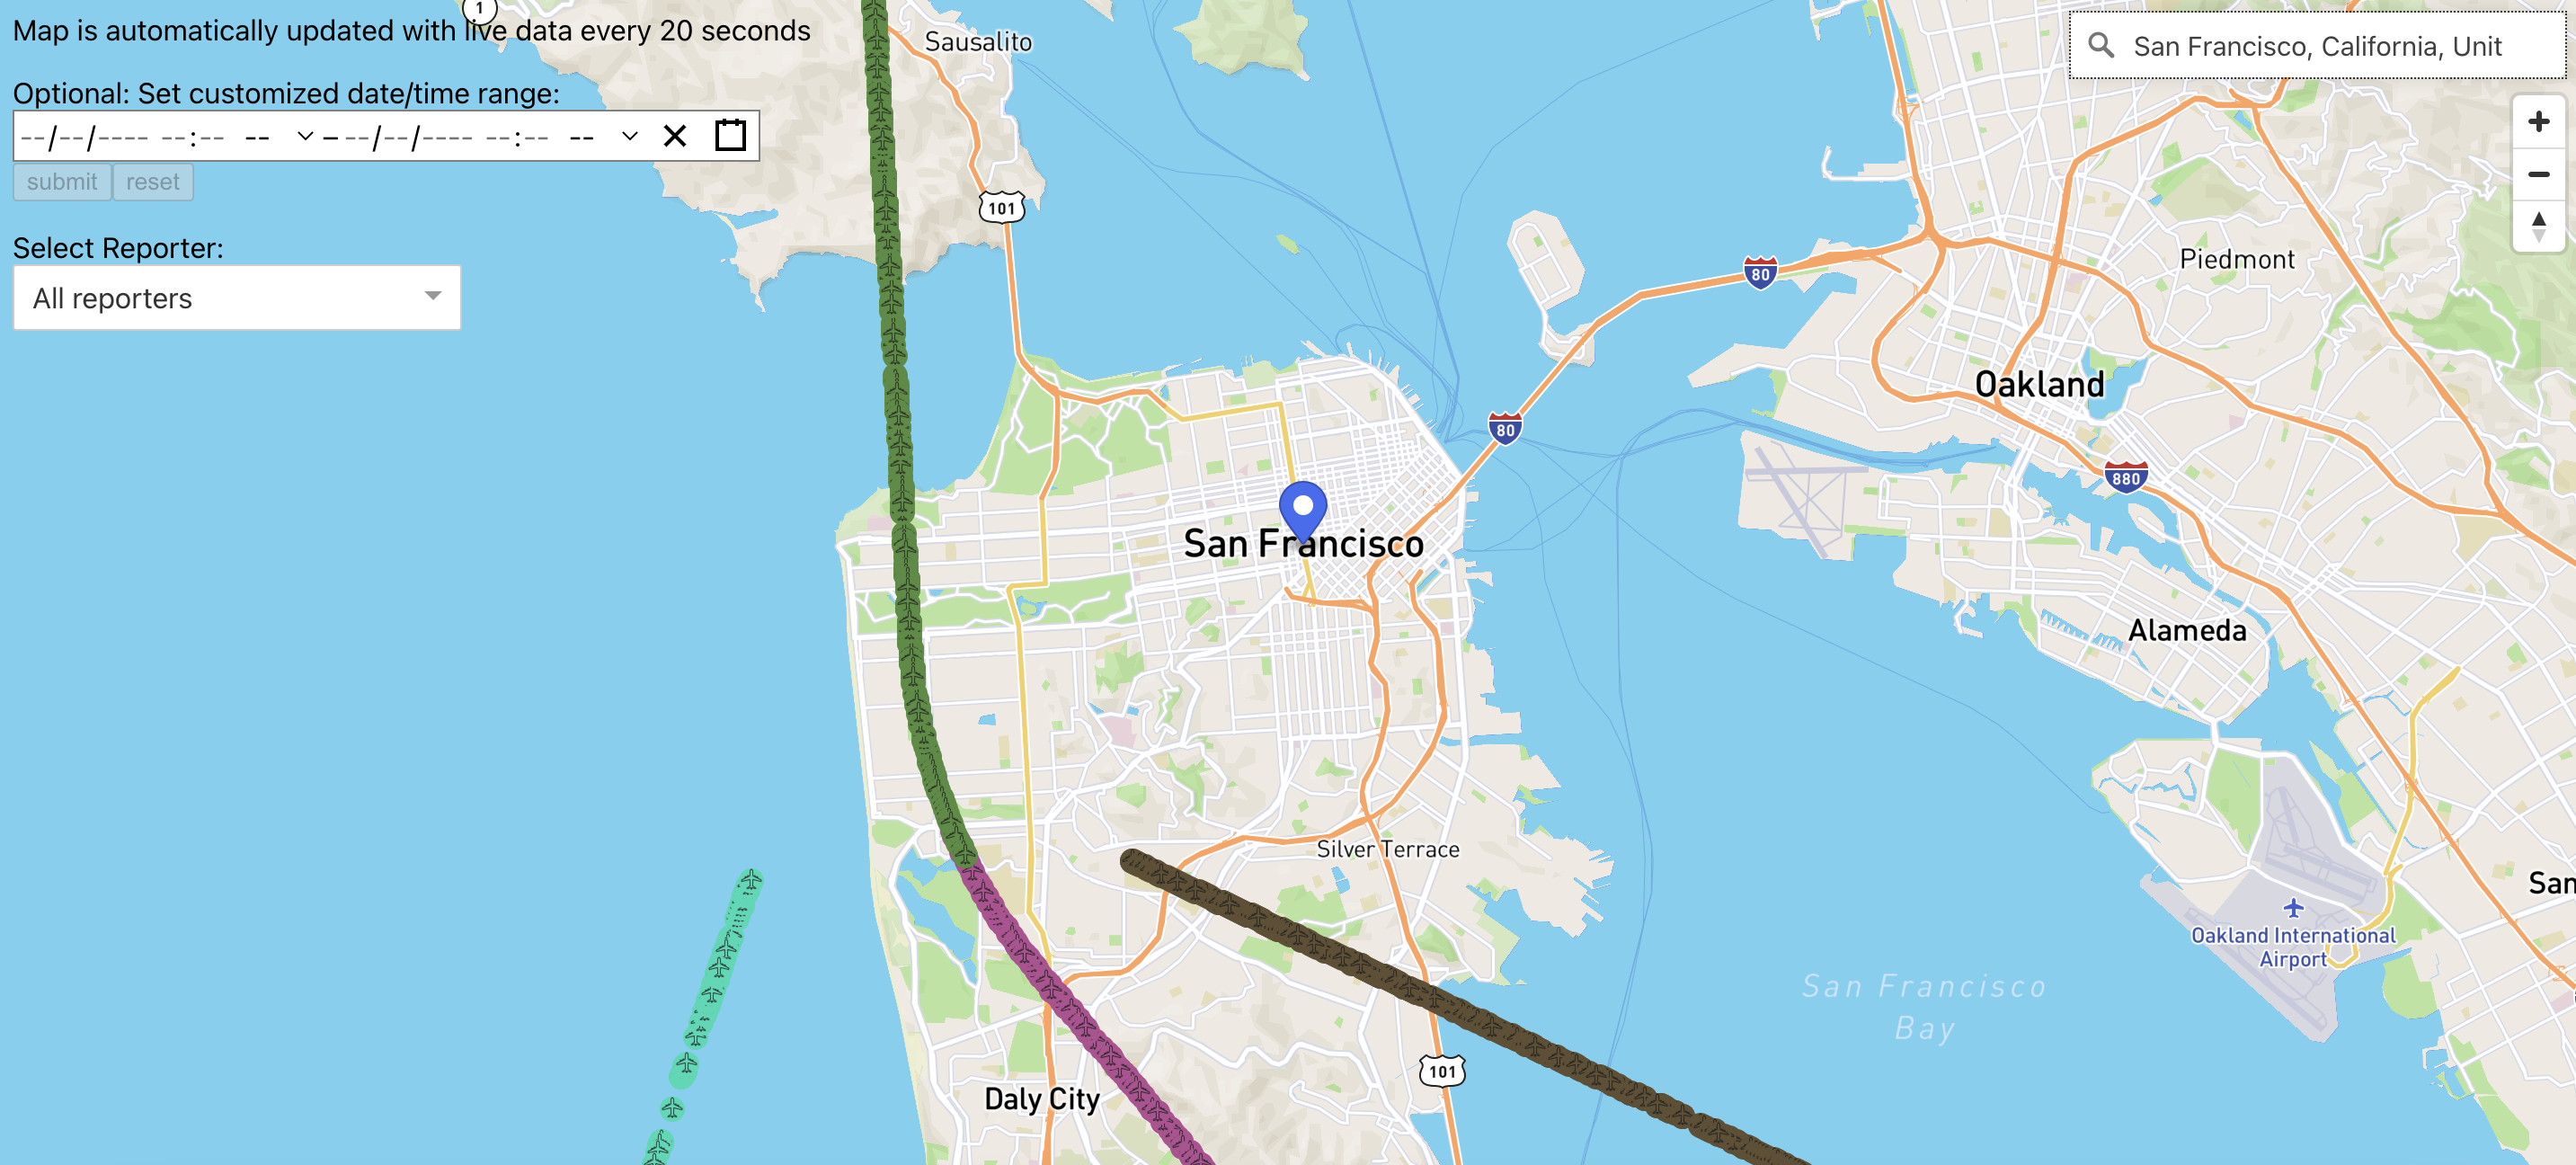
Feature 4: Search Markers based on Location
- Using the search box in the top-right corner of the application, users can provide a specific location, and the map will center around the location, just like the image below.
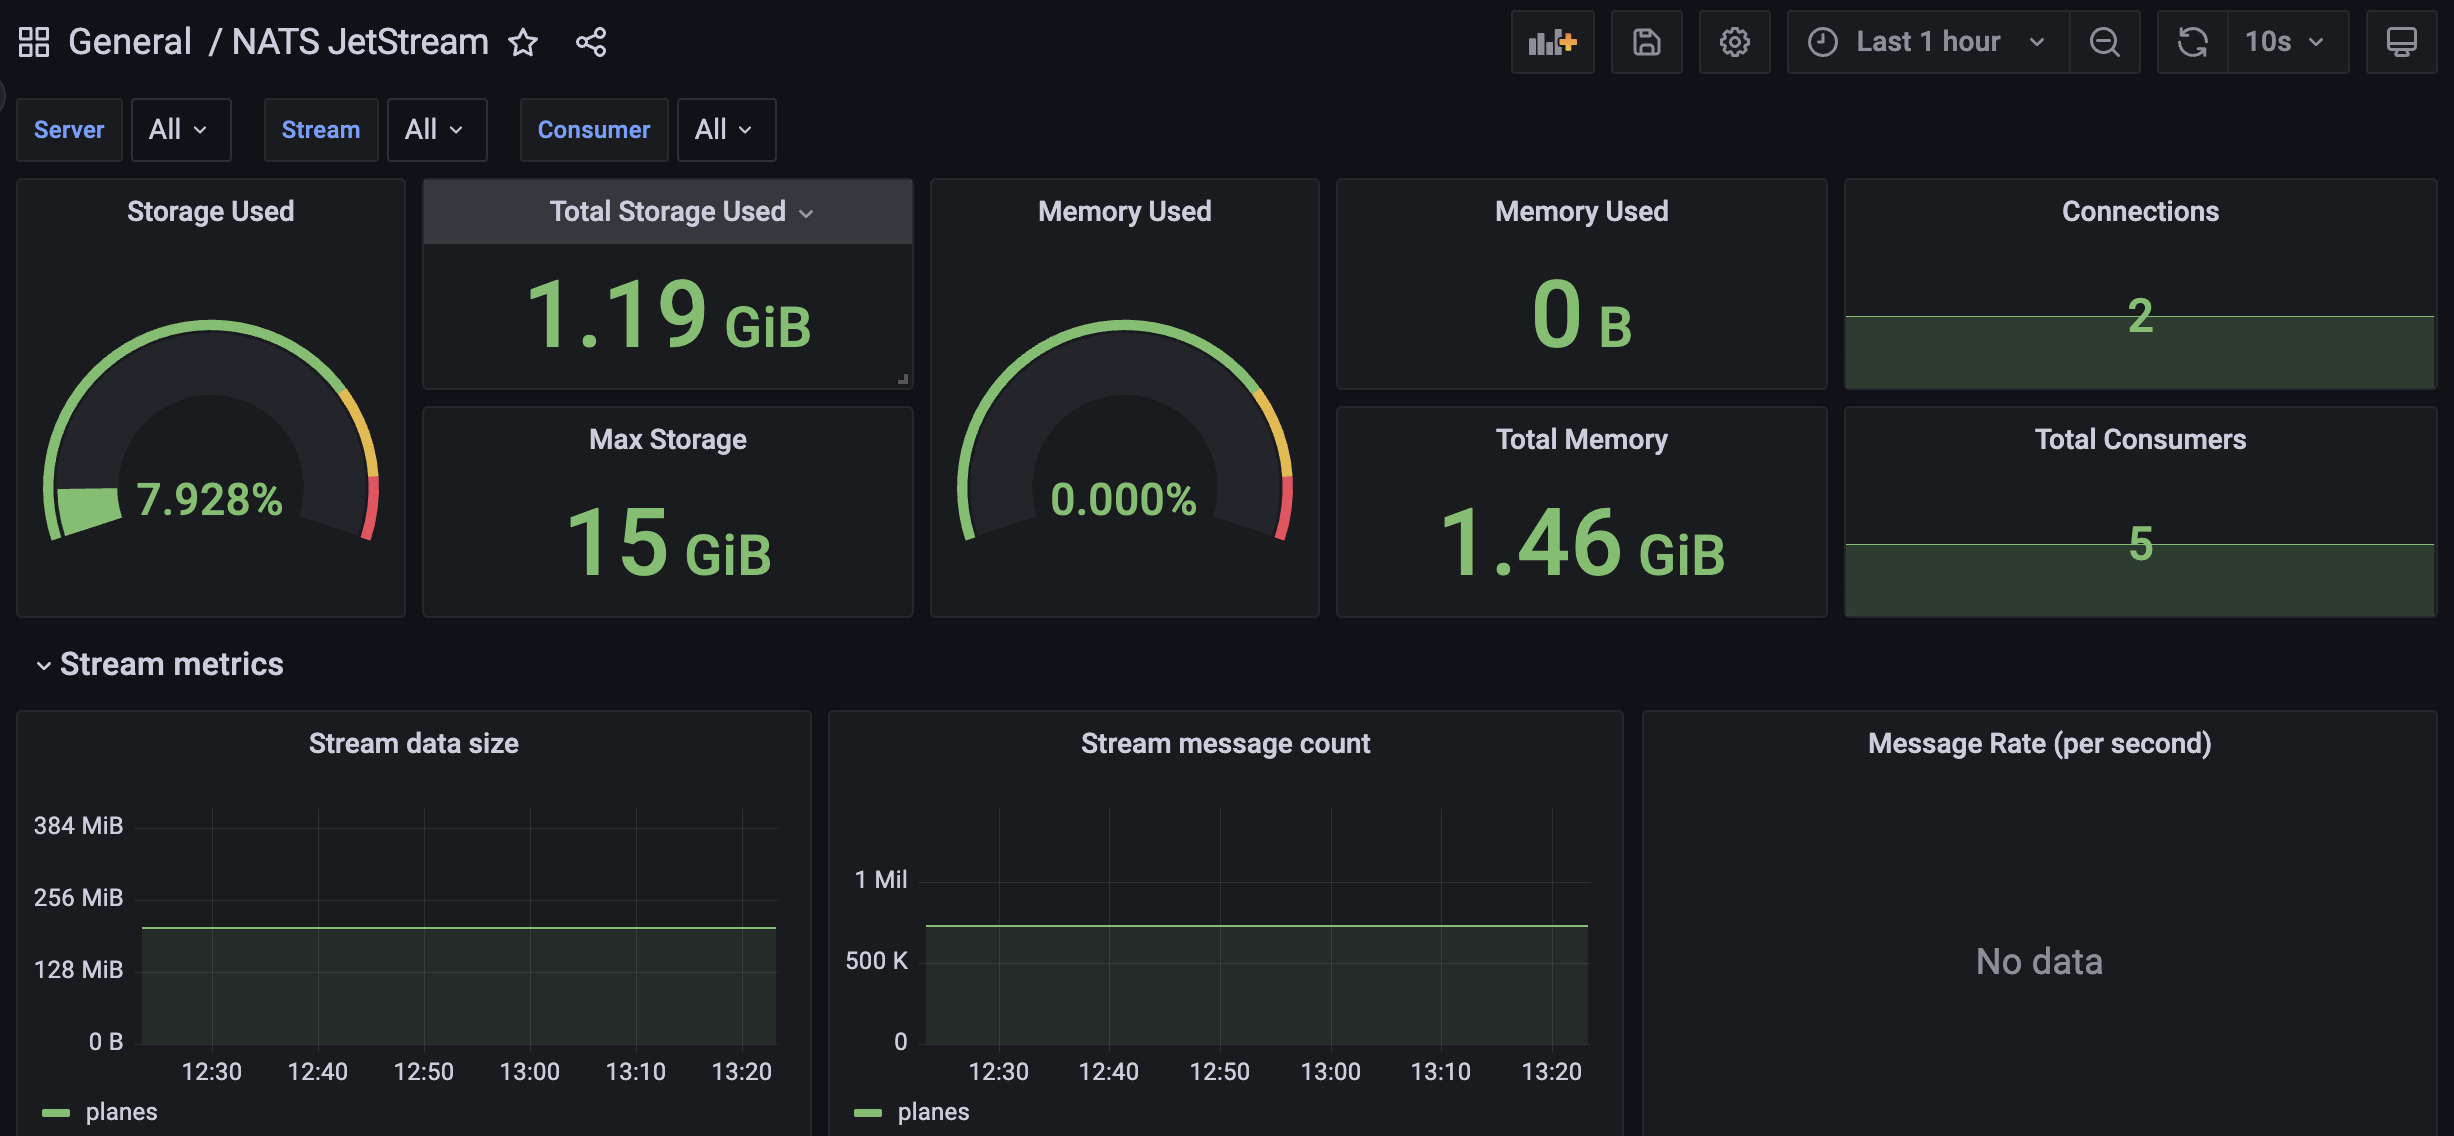
Method 3: Using the System Health Dashboard
💡 Only if the Dashboard component has already been built out. Otherwise please use Method 1 for verification.
- Access the Dashboard via this link
- Login (currently, everyone will use the admin account to connect)
- Username: admin
- Password: nHfRsZmnd9RvyEQYc12wUyryBsMFNEZsV5gomjnX
- The dashboard should look something like this if the time range is the “last 1 hour”
Optional: Installing Docker on Raspberry Pi
If you have access to a Raspberry Pi or other computing device you would prefer to run the client on, you can follow the above instructions to get it set up there after these instructions.
Hint: It is probably easier to have a continuously running client program using a Rasberry Pi versus your personal laptop in the long-term. Using a Raspberry Pi for a continuously running client program is advantageous in the long term due to its lower power consumption, stability, and cost-effectiveness, compared to using a personal laptop which may experience interruptions and higher energy consumption. Raspberry Pi devices provide dedicated, reliable operation without tying up personal computing resources.
synthesized from: https://www.simplilearn.com/tutorials/docker-tutorial/raspberry-pi-docker
- Upgrade and Update
sudo apt-get update && sudo apt-get upgrade
- Download and Install Docker on Rasberry Pi Environment
- Push this installation script:
curl -fsSL https://get.docker.com -o get-docker.sh - Run the script:
sudo sh get-docker.sh
- Push this installation script:
- Add the Pi user to the Docker group
sudo usermod -aG docker Pi
- Check Docker version and System Wide Details
docker versiondocker info