Frontend
Introduction
The application demoed here is an Airplane Tracker, which is similar to some other relevant applications, such as FlightAware and Flightradar24. However, we want to emphasize that the main focus of our work is not on the Airplane Tracker, but instead on the whole pipeline. When you set up the pipeline by following our tutorial, you can create a wide range of applications, not just the Airplane Tracker. The application here can also serve as one place for you to check if your pipeline is working or not.
Tech Stack of the Frontend Airplane Tracker
You can take a glimpse of the Airplane Tracker application that we made by following through the section below, Using our Frontend Airplane Tracker Visualization. It shall give you some sense of the general functionality of the app.
1. Create the Frontend Airplane Tracker Locally
Download Development Tools
React
React: a popular Javascript library for building user interfaces based on components. For more references on React, please refer to the official React website: https://react.dev/
To download React, you need to download Node.js, an open-source, cross-platform Javascript run-time environment that executes Javascript code outside a browser, and node package manager (npm), a dependency management tool for javascript applications.
Go to the link https://nodejs.org/en/download to download Node.js and npm
Checkpoint: If you have successfully downloaded Node.js and npm, type those commands in the terminal, and they should output the version.
$ node -v
$ npm -v
Set up a basic React app
- At any directory you choose, type
npm init react-app <project name>in the terminal. The command creates a folder named<project name>with all required files for a React app. - Navigate to the folder by typing
cd <project name> - Start the development server by typing
npm start. You should see a default web page showing up at http://localhost:3000/
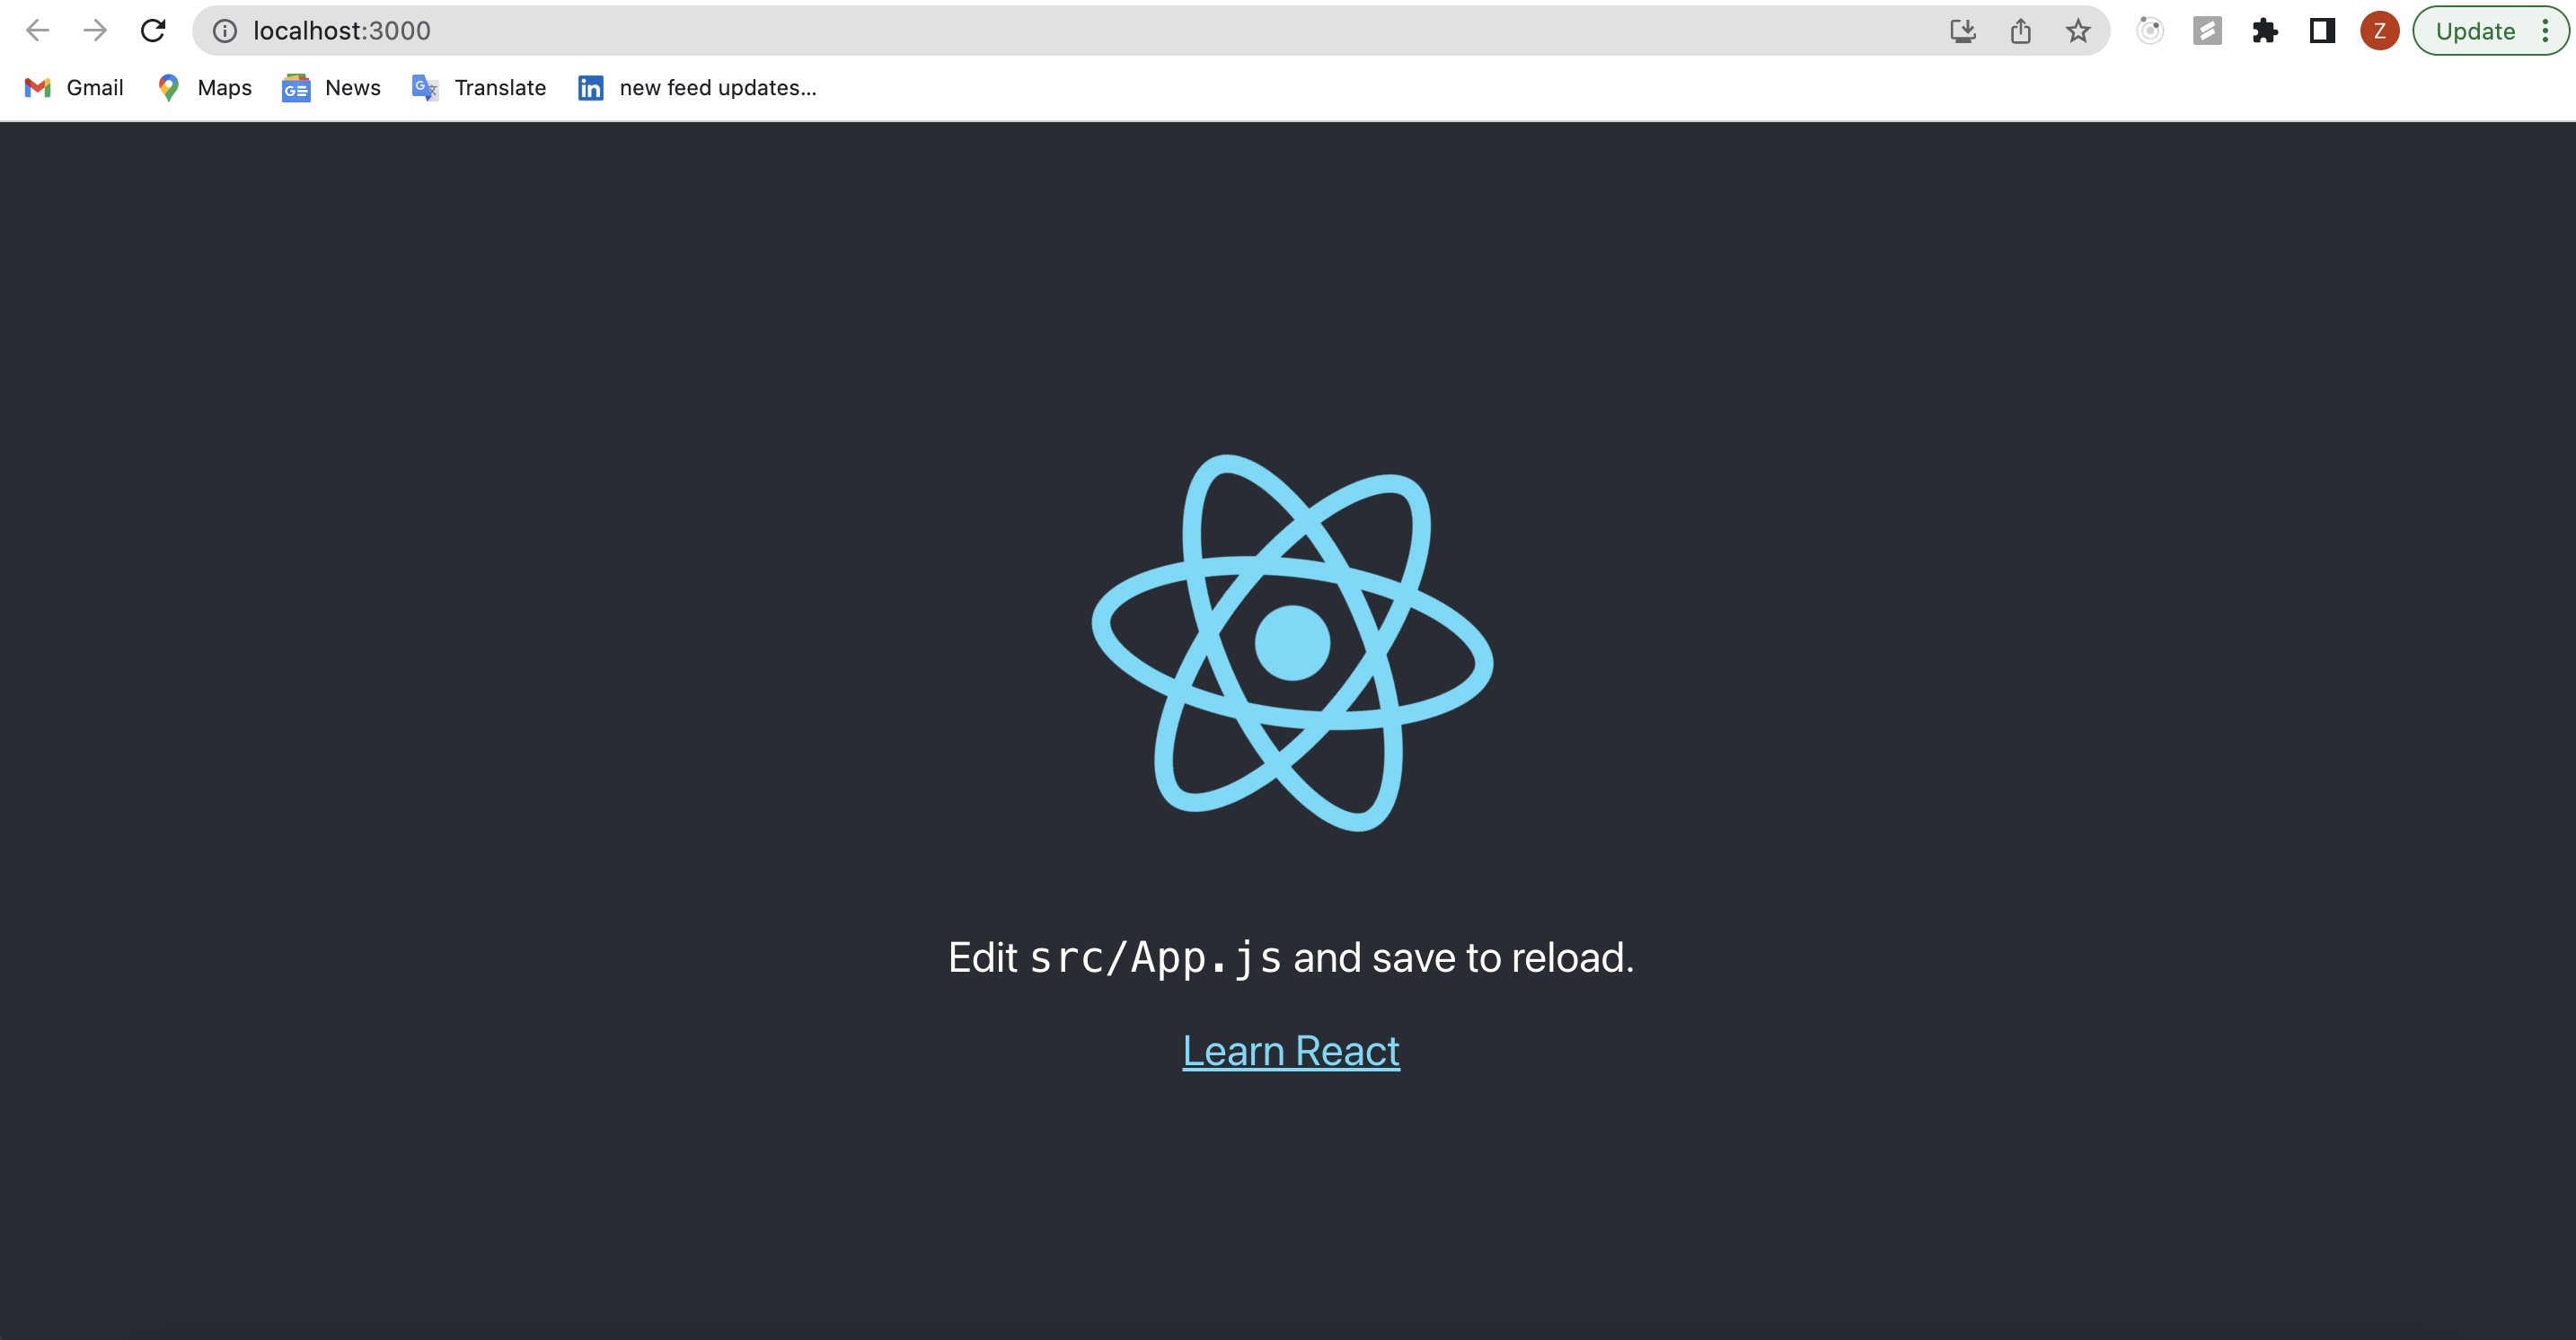
Checkpoint: Ensure you can see the “Learn React” webpage at http://localhost:3000/ when working on Step 3. The webpage should look like the picture below.
Let’s look at the structure of the folder in a tree format, with some comments besides the files.
├── README.md // instructions on running the react app
├── node_modules // contains actual files for dependencies
├── package-lock.json
├── package.json // metadata of the project
├── public
│   ├── favicon.ico
│   ├── index.html // HTML file for serving the react app
│   ├── logo192.png
│   ├── logo512.png
│   ├── manifest.json
│   └── robots.txt
└── src
    ├── App.css // CSS styles for the App component
    ├── App.js // the App component, the main file to add js code
    ├── App.test.js
    ├── index.css
    ├── index.js // root file for rendering the App component
    ├── logo.svg
    ├── reportWebVitals.js
    └── setupTests.js
To build the Airplane Tracker, here is a list of files that we will modify:
/src/App.js/src/App.css/src/index.js/public/index.html
Install Packages
Mapbox
Mapbox: a graphing library for creating interactive map experience
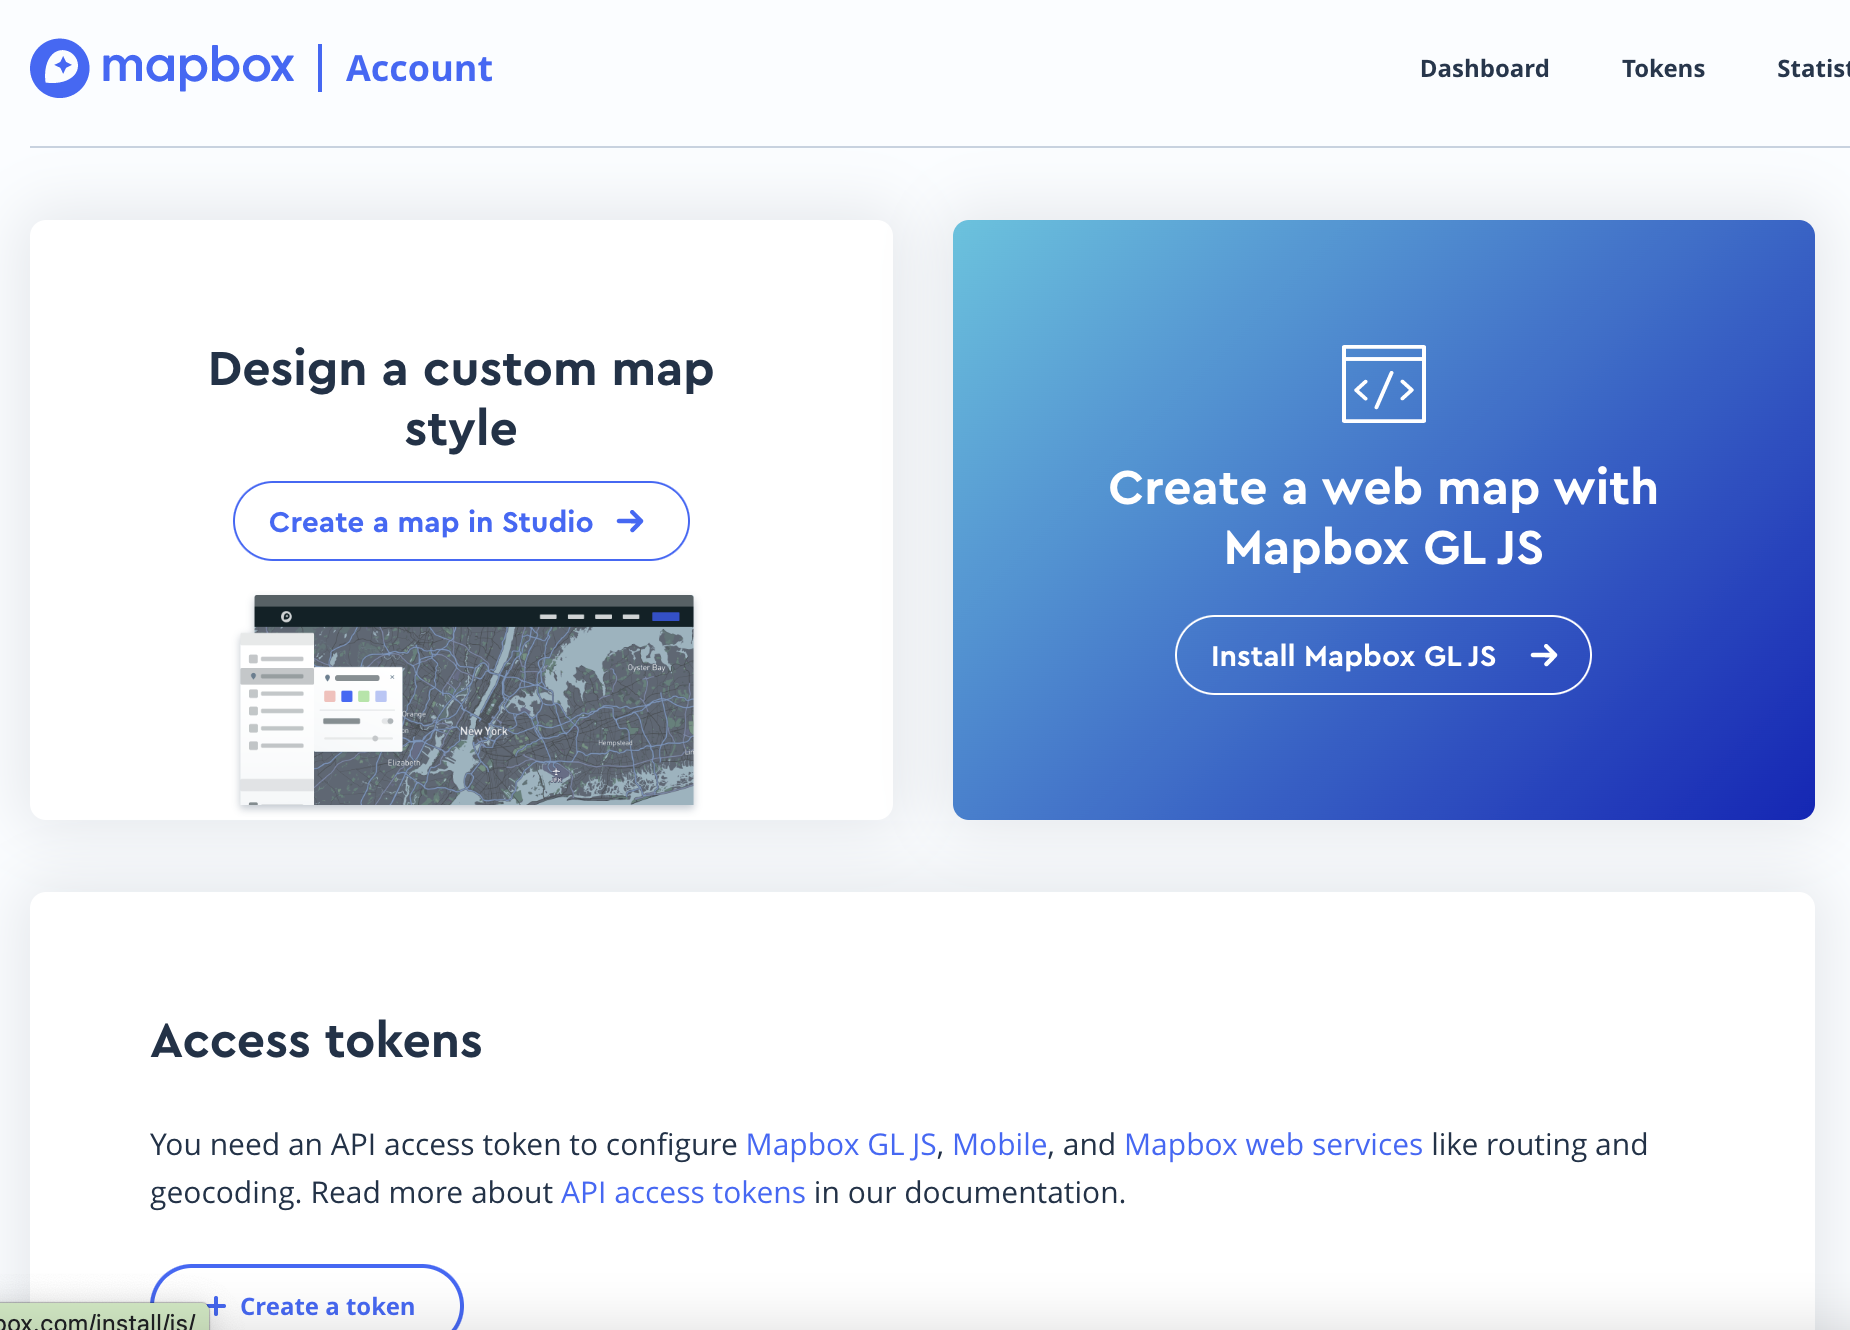
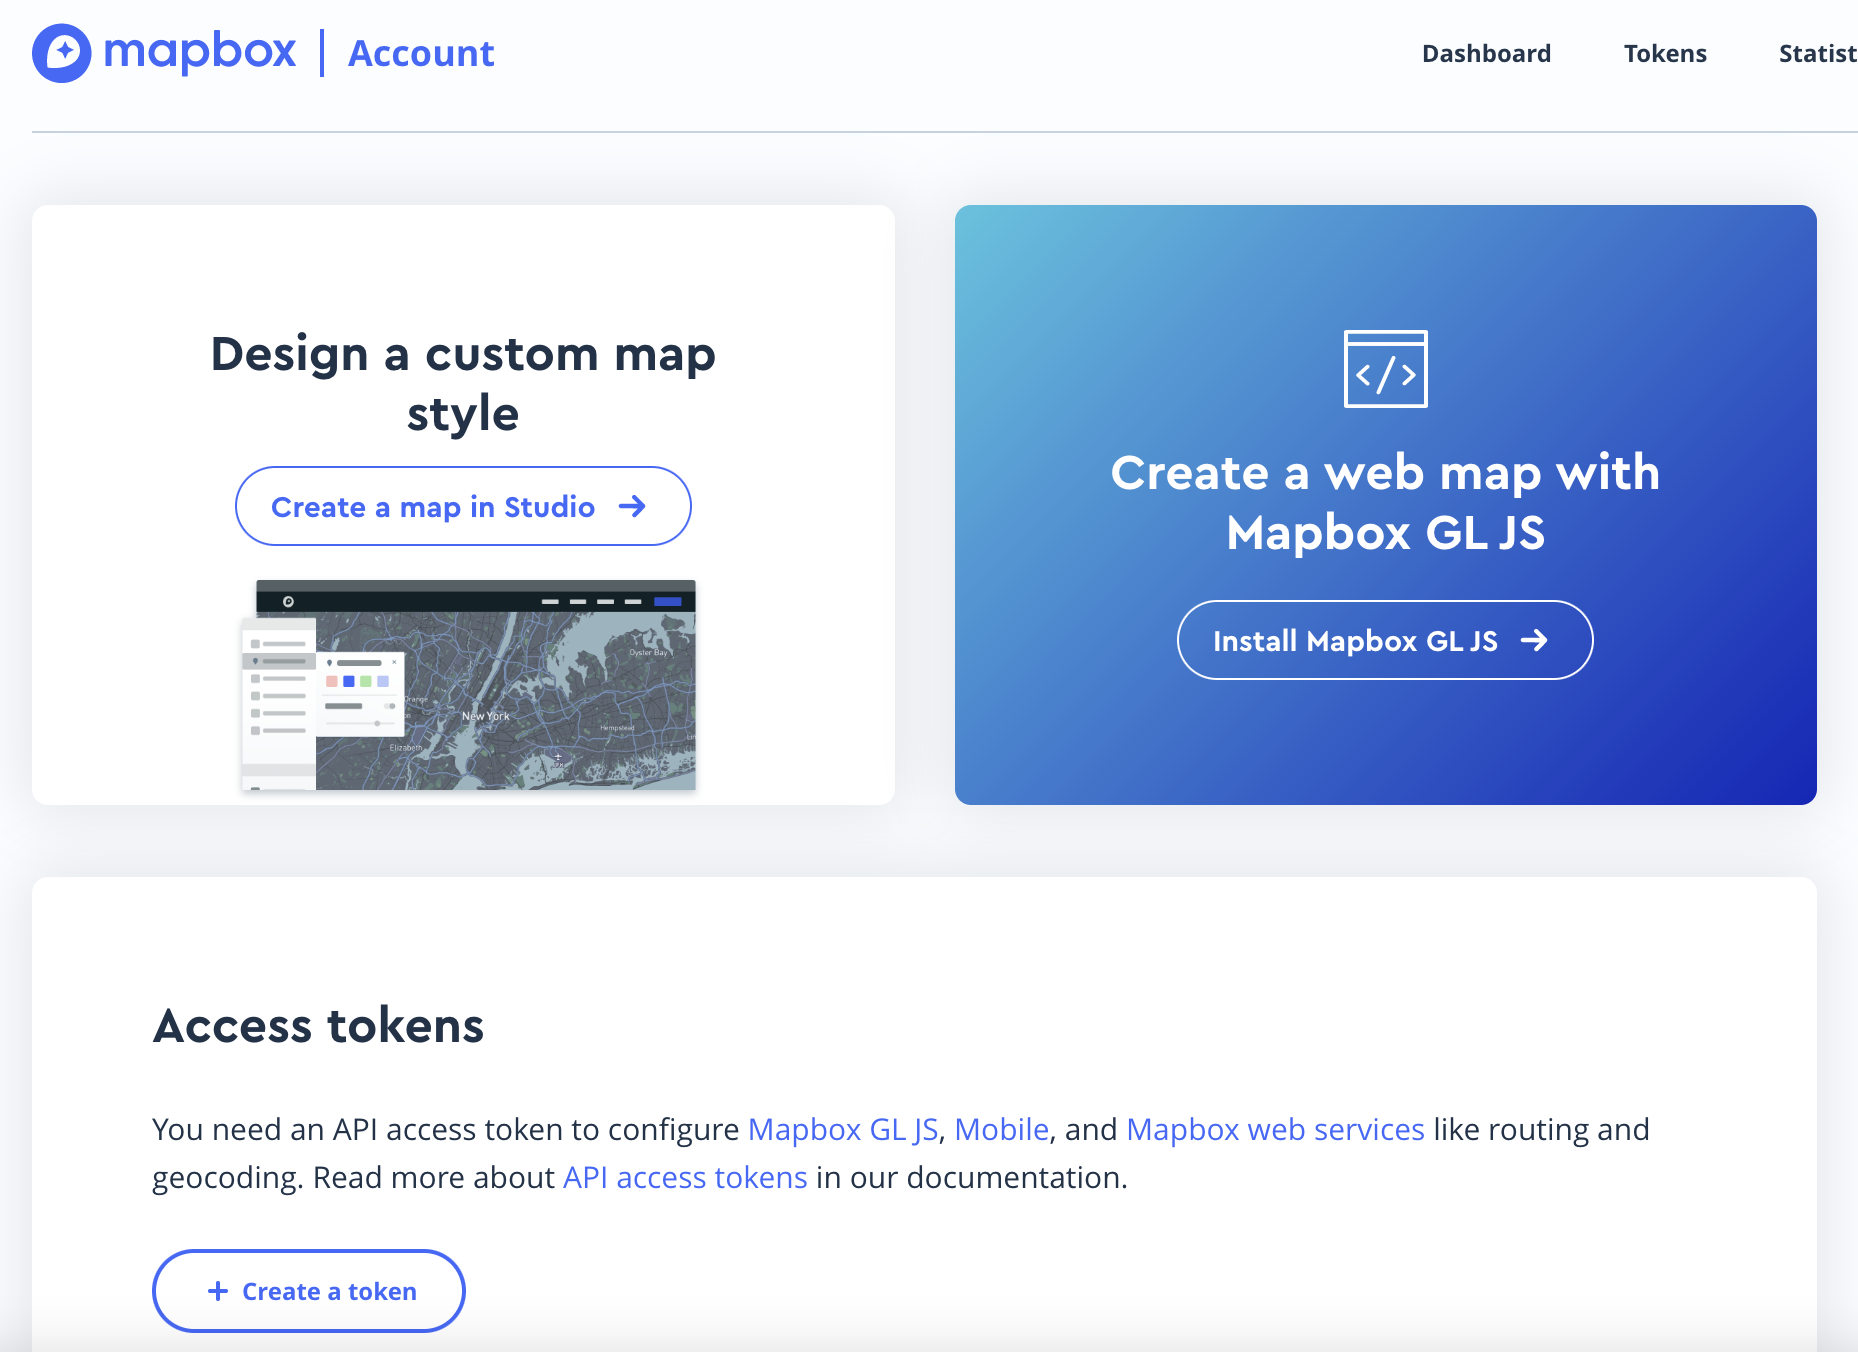
- Create an account through https://account.mapbox.com/
- On the account page, click “Install Mapbox GL JS” (Mapbox GL JS is a Javascript library with Mapbox’s modern mapping technology)
- Pick
npmas the method for installing Mapbox GL JS - Under the
<project name>directory, typenpm install mapbox-gl --savein the terminal - Include the GL JS CSS file in the
<head>of/public/index.html<link href='https://api.mapbox.com/mapbox-gl-js/v2.8.1/mapbox-gl.css' rel='stylesheet' />
Checkpoint: If you successfully download Mapbox GL JS, there shall be “mapbox-gl” within the dependencies of /package.json.
A snapshot of the package.json file:
{
    "dependencies": {
    "@testing-library/jest-dom": "^5.16.5",
    "@testing-library/react": "^13.4.0",
    "@testing-library/user-event": "^13.5.0",
    "mapbox-gl": "^2.14.1",
    "react": "^18.2.0",
    "react-dom": "^18.2.0",
    "react-scripts": "5.0.1",
    "web-vitals": "^2.1.4"
  },
}
You also need to create an access token on the Mapbox account page so that you can use all Mapbox APIs inside your project. Within the “Access tokens” section, you can either use the default public token or create a token on your own.
For more references on Mapbox, please check out its official website: https://www.mapbox.com/
For more references on Mapbox GL JS APIs, please check out https://docs.mapbox.com/mapbox-gl-js/guides/
Mapbox GL Geocoder
Mapbox GL Geocoder: A geocoder control for Mapbox GL JS using the Mapbox Geocoding API. The package allows us to add the place search in our application.
More references can be found on its GitHub website: https://github.com/mapbox/mapbox-gl-geocoder
To download Mapbox GL Geocoder, under the <project name> directory, type npm install --save @mapbox/mapbox-gl-geocoder in the terminal
Checkpoint: If you successfully download Axios, there shall be “@mapbox/mapbox-gl-geocoder” within the dependencies of /package.json.
{
    "dependencies": {
    "@mapbox/mapbox-gl-geocoder": "^5.0.1",
    "@testing-library/jest-dom": "^5.16.5",
    "@testing-library/react": "^13.4.0",
    "@testing-library/user-event": "^13.5.0",
    "mapbox-gl": "^2.14.1",
    "react": "^18.2.0",
    "react-dom": "^18.2.0",
    "react-scripts": "5.0.1",
    "web-vitals": "^2.1.4"
  },
}
Axios
Axios is a promised-based HTTP client for Node.js and the browser. In simple words, it serves as a client for sending requests to the Flask backend APIs and receiving responses correspondingly.
To download Axios, under the <project name> directory, type npm install axios in the terminal.
Checkpoint: If you successfully download Axios, there shall be “axios” within the dependencies of /package.json.
A snapshot of the package.json file:
{
    "dependencies": {
    "@mapbox/mapbox-gl-geocoder": "^5.0.1",
    "@testing-library/jest-dom": "^5.16.5",
    "@testing-library/react": "^13.4.0",
    "@testing-library/user-event": "^13.5.0",
    "axios": "^1.4.0",
    "mapbox-gl": "^2.14.1",
    "react": "^18.2.0",
    "react-dom": "^18.2.0",
    "react-scripts": "5.0.1",
    "web-vitals": "^2.1.4"
  },
}
More references on Axios can be found at https://axios-http.com/docs/intro
Develop a Real-Time Airplane Tracker
In the section, we will start adding code in different places within the project folder so we can have a real-time airplane tracker.
Replace the code in /src/App.js with the following:
import './App.css';
import React, { useRef, useEffect, useState } from 'react';
import axios from 'axios';
// eslint-disable-next-line import/no-webpack-loader-syntax
import mapboxgl from '!mapbox-gl';
import MapboxGeocoder from '@mapbox/mapbox-gl-geocoder';
import '@mapbox/mapbox-gl-geocoder/dist/mapbox-gl-geocoder.css';

// please paste your Mapbox access token here
mapboxgl.accessToken = '';

// hyperparameters set for the app
const PAST_TIME = 90 * 1000;    // when the app loads, fetch the airplane data from the past 90s
const UPDATE_TIME = 20 * 1000;  // the app updates with new data every 20s
const WINDOW_TIME = 30 * 1000;  // with each update, the appes the data from the past 30s
const FLUSH_LIMIT = 1200;       // the app does a flush when the number of markers on the map exceeds 1200
const Modes = {
    REAL_TIME: "real_time",
}

const colorMap = new Map();     // a map to give unique colors to different planes

const App = () => {
  // set up states for the app
  // set up Mapbox map element
  const map = useRef(null);
  const mapContainerRef = useRef(null);

  // variable to keep track of airplane markers elements
  const markers = useRef([]);

  // keep track of the current mode: real_time (used in our app with advanced features)
  const [mode, setMode] = useState(Modes.REAL_TIME);

  /**
   *
   * @param {*} timeDate: a Javascript Date object
   * @returns param: a time string that can be used to construct Flask backend API url
   */
  const getTimeParam = (timeDate) => {
    const [date, timeInfo] = timeDate.toISOString().split("T");
    const time = timeInfo.split(".")[0];

    const param = date + "T" + time;
    return param;
  }

  /**
   *
   * @param {*} url: a string that refers to the Flask backend API url
   * the function makes a request to the url, gets the response, and displays new airplane markers
   */
  const getFlightRequest = (url) => {
    // use axios to make a request to the Flask backend
    axios.get(url)
    .then(res => {
      // the frontend gets response from the Flask backend

      // clean data
      let data = res.data.map((dataItem) => {
        if ("_source" in dataItem && "inner_hits" in dataItem)  {
          return {"_source": dataItem["_source"], "inner_hits": dataItem["inner_hits"]};
        }
      });

      data = data.filter((dataItem) => ("lon" in dataItem["_source"] && "lat" in dataItem["_source"]));

      // fetch only the last 500 datapoints from the data to avoid rendering too many data
      if (mode === Modes.REAL_TIME) {
        data = data.slice(-500);
      }

      // an array to store new airplane markers
      const markersTemp = [];

      // Render custom marker components
      data.forEach((dataItem) => {
        // determine marker color
        var color;
        const source = dataItem["_source"];
        const icao = source["ICAO"].toUpperCase();
        if (colorMap.has(icao)){
          color = colorMap.get(icao);
        } else {
          const randomColor = "#" + Math.floor(Math.random()*16777215).toString(16).padStart(6, '0').toUpperCase();
          colorMap.set(icao, randomColor);
          color = colorMap.get(icao);
        }

        // create a parent class for the marker
        const el = document.createElement('div');
        el.className = 'marker';
        el.style.backgroundColor = color;

        // fetch info to be displayed in the marker popup
        const time = new Date(source.time + "Z");
        const dateString = time.toLocaleDateString();
        const timeString = time.toLocaleTimeString();

        const {aircraft, manufacturer, feet, registered} = source;
        let {reporter_uid} = source;
        const airplaneType = manufacturer === "unknown"? "not available" : manufacturer + ' ' + aircraft;
        reporter_uid = reporter_uid === undefined? "anonymous user" : reporter_uid;

        // Create a Mapbox Marker at our new DOM node
        const marker = new mapboxgl.Marker(el)
          .setPopup(
            new mapboxgl.Popup({ offset: 10, maxWidth: '300px'}) // add popup
            .setHTML(
              `
              <div>
                <div><strong>ICAO:</strong> ${icao}</div>
                <div><strong>Altitude:</strong> ${feet} ft</div>
                <div><strong>Time:</strong> ${dateString + ' ' + timeString}</div>
                <div><strong>Aircraft:</strong> ${airplaneType}</div>
                <div><strong>Registered by:</strong> ${registered}</div>
              </div>
              `
            )
          )
          .setLngLat([source["lon"], source["lat"]])
          .addTo(map.current);
        marker.time = time;
        marker.reporter = reporter_uid;
        markersTemp.push(marker);
      });

      if (mode === Modes.REAL_TIME) {
        // combine new markers with the existing markers
        let newMarkers = [...markers.current, ...markersTemp];

        // the app flushes the data when the number of markers is over the limit
        if (newMarkers.length >= FLUSH_LIMIT) {
          // sort all markers based on time ascending and only keep last 500 markers
          newMarkers.sort((a, b) => a.time.getTime() - b.time.getTime());
          const tempMarkers = newMarkers.slice(0, newMarkers.length - 500);
          tempMarkers.forEach(marker => marker.remove());
          newMarkers = newMarkers.slice(-500);
        }
        markers.current = newMarkers;
      }

      // Clean up on unmount
      return () => map.current.remove();
    })
  }

  /**
   *
   * @param {*} timeDiff: a number that represents time in milliseconds
   * the function constructs the API call and let the getFlightRequest function handle the url call
   */
  const getFlightData = (timeDiff) => {
    const now = Date.now();
    const startTime = getTimeParam(new Date(now - timeDiff));
    const endTime = getTimeParam(new Date(now));
    const url = `https://elastic.spectrumdatapipeline.net/getJsonStreamCompress?start_date=${startTime}&&end_date=${endTime}`;
    getFlightRequest(url);
  }

  /**
   *
   * @param {*} longitude: a number that represents longitude
   * @param {*} latitude: a number that represents latitude
   * the function uses these two parameters to construct a map
   *
   */
  const renderMap = (longitude, latitude) => {
    map.current = new mapboxgl.Map({
      container: mapContainerRef.current,
      style: "mapbox://styles/mapbox/streets-v11",
      center: [longitude, latitude],
      zoom: 9,
    });

    // add a Geocoder to enable place search
    map.current.addControl(new MapboxGeocoder({
      accessToken: mapboxgl.accessToken,
      mapboxgl: mapboxgl,
      language: "en-EN",
    }), "top-right");
    map.current.addControl(new mapboxgl.NavigationControl(), "top-right");
  }

  // when the app loads, get browser permission on device location
  // and render the map
  useEffect(() => {
    if (map.current) return;

    var longitude = -122.3;
    var latitude = 37.8;

    // enable browser permission on device permission
    if (navigator.permissions) {
      navigator.permissions.query({name:'geolocation'}).then((result) => {
        if (result.state === 'denied') {
          console.log("Geolocation not supported by the browser");
          renderMap(longitude, latitude);
        } else if (result.state === "prompt") {
          navigator.geolocation.getCurrentPosition((position) => {
            longitude = position.coords.longitude;
            latitude = position.coords.latitude;
            renderMap(longitude, latitude);
          }, (err) => {
            console.log("Geolocation not supported by the browser");
            renderMap(longitude, latitude);
          });
        } else if (result.state === "granted") {
          if (navigator.gelocation) {
            navigator.geolocation.getCurrentPosition((position) => {
              longitude = position.coords.longitude;
              latitude = position.coords.latitude;
              renderMap(longitude, latitude);
            });
          } else {
            console.log("Geolocation not supported by the browser");
            renderMap(longitude, latitude);
          }
        }
      });
    } else {
      console.log("Geolocation not supported by the browser");
      renderMap(longitude, latitude);
    }
  }, [])

  useEffect(() => {
    if (mode === Modes.REAL_TIME) {
      // when the app first loads, gets airplane data in the past PAST_TIME
      getFlightData(PAST_TIME);

      // the app updates the map every UPDATE_TIME, fetching data in the past WINDOW_TIME
      const updateInterval = setInterval(() => {
        getFlightData(WINDOW_TIME);
      }, UPDATE_TIME);

      return () => {
        clearInterval(updateInterval);
      };
    }
  }, [mode])

  return (
    <div className="container">
      <div className="form">
        <div>
          Map is automatically updated with live data every {UPDATE_TIME / 1000} seconds
        </div>
      </div>
      <div className="map-container" ref={mapContainerRef} />
    </div>
  );
};

export default App;
The above code block contains comments along the way for you to understand the general structure, and, if you have any React-specific questions, please refer to https://react.dev/
In the above code block, there are two lines you need to modify
- Add your own Mapbox access token
mapboxgl.accessToken = ''; - In the
getFlightDatafunction, replace theurlvariable with the API call you created in Websever & Backend
Replace the code in /src/App.css with the following:
.App {
  text-align: center;
}

.container {
  position: relative;
}

.form {
  position: absolute;
  z-index: 5;
  top: 10px;
  left: 10px;
}

.marginTop {
  margin-top: 1rem;
}

.bg-w {
  background-color: white;
}

.map-container {
  height: 100vh;
}

.mapboxgl-ctrl-geocoder {
  width: 275px!important;
}

.marker {
    /* border: 1px solid black; */
    color: white;
    padding: 5px;
    text-align: center;
    text-decoration: none;
    display: inline-block;
    font-size: 6px;
    margin: 4px 2px;
    border-radius: 50%;
    width: 4px;
    height: 4px;
    content: "\2708";
    /* background-image: url(https://cdn-icons-png.flaticon.com/512/0/614.png); */
    background-image: url(https://static.vecteezy.com/system/resources/previews/014/455/865/original/plane-icon-icon-on-transparent-background-free-png.png);
    background-size: contain;
    background-repeat: no-repeat;
    cursor: pointer;
}
The file adds CSS style to the HTML elements created in /src/App.js
You should have included Mapbox stylesheet in /public/index.html
<!DOCTYPE html>
<html lang="en">
  <head>
    <meta charset="utf-8" />
    <link rel="icon" href="%PUBLIC_URL%/favicon.ico" />
    <meta name="viewport" content="width=device-width, initial-scale=1" />
    <meta name="theme-color" content="#000000" />
    <meta
      name="description"
      content="Web site created using create-react-app"
    />
    <link href='https://api.mapbox.com/mapbox-gl-js/v2.8.1/mapbox-gl.css' rel='stylesheet' />
    <link rel="apple-touch-icon" href="%PUBLIC_URL%/logo192.png" />
    <!--
      manifest.json provides metadata used when your web app is installed on a
      user's mobile device or desktop. See https://developers.google.com/web/fundamentals/web-app-manifest/
    -->
    <link rel="manifest" href="%PUBLIC_URL%/manifest.json" />
    <!--
      Notice the use of %PUBLIC_URL% in the tags above.
      It will be replaced with the URL of the `public` folder during the build.
      Only files inside the `public` folder can be referenced from the HTML.

      Unlike "/favicon.ico" or "favicon.ico", "%PUBLIC_URL%/favicon.ico" will
      work correctly both with client-side routing and a non-root public URL.
      Learn how to configure a non-root public URL by running `npm run build`.
    -->
    <title>React App</title>
  </head>
  <body>
    <noscript>You need to enable JavaScript to run this app.</noscript>
    <div id="root"></div>
    <!--
      This HTML file is a template.
      If you open it directly in the browser, you will see an empty page.

      You can add webfonts, meta tags, or analytics to this file.
      The build step will place the bundled scripts into the <body> tag.

      To begin the development, run `npm start` or `yarn start`.
      To create a production bundle, use `npm run build` or `yarn build`.
    -->
  </body>
</html>
After you have done all those changes, run npm start in the <project name> directory in the terminal, and you can access the app through http://localhost:3000/.
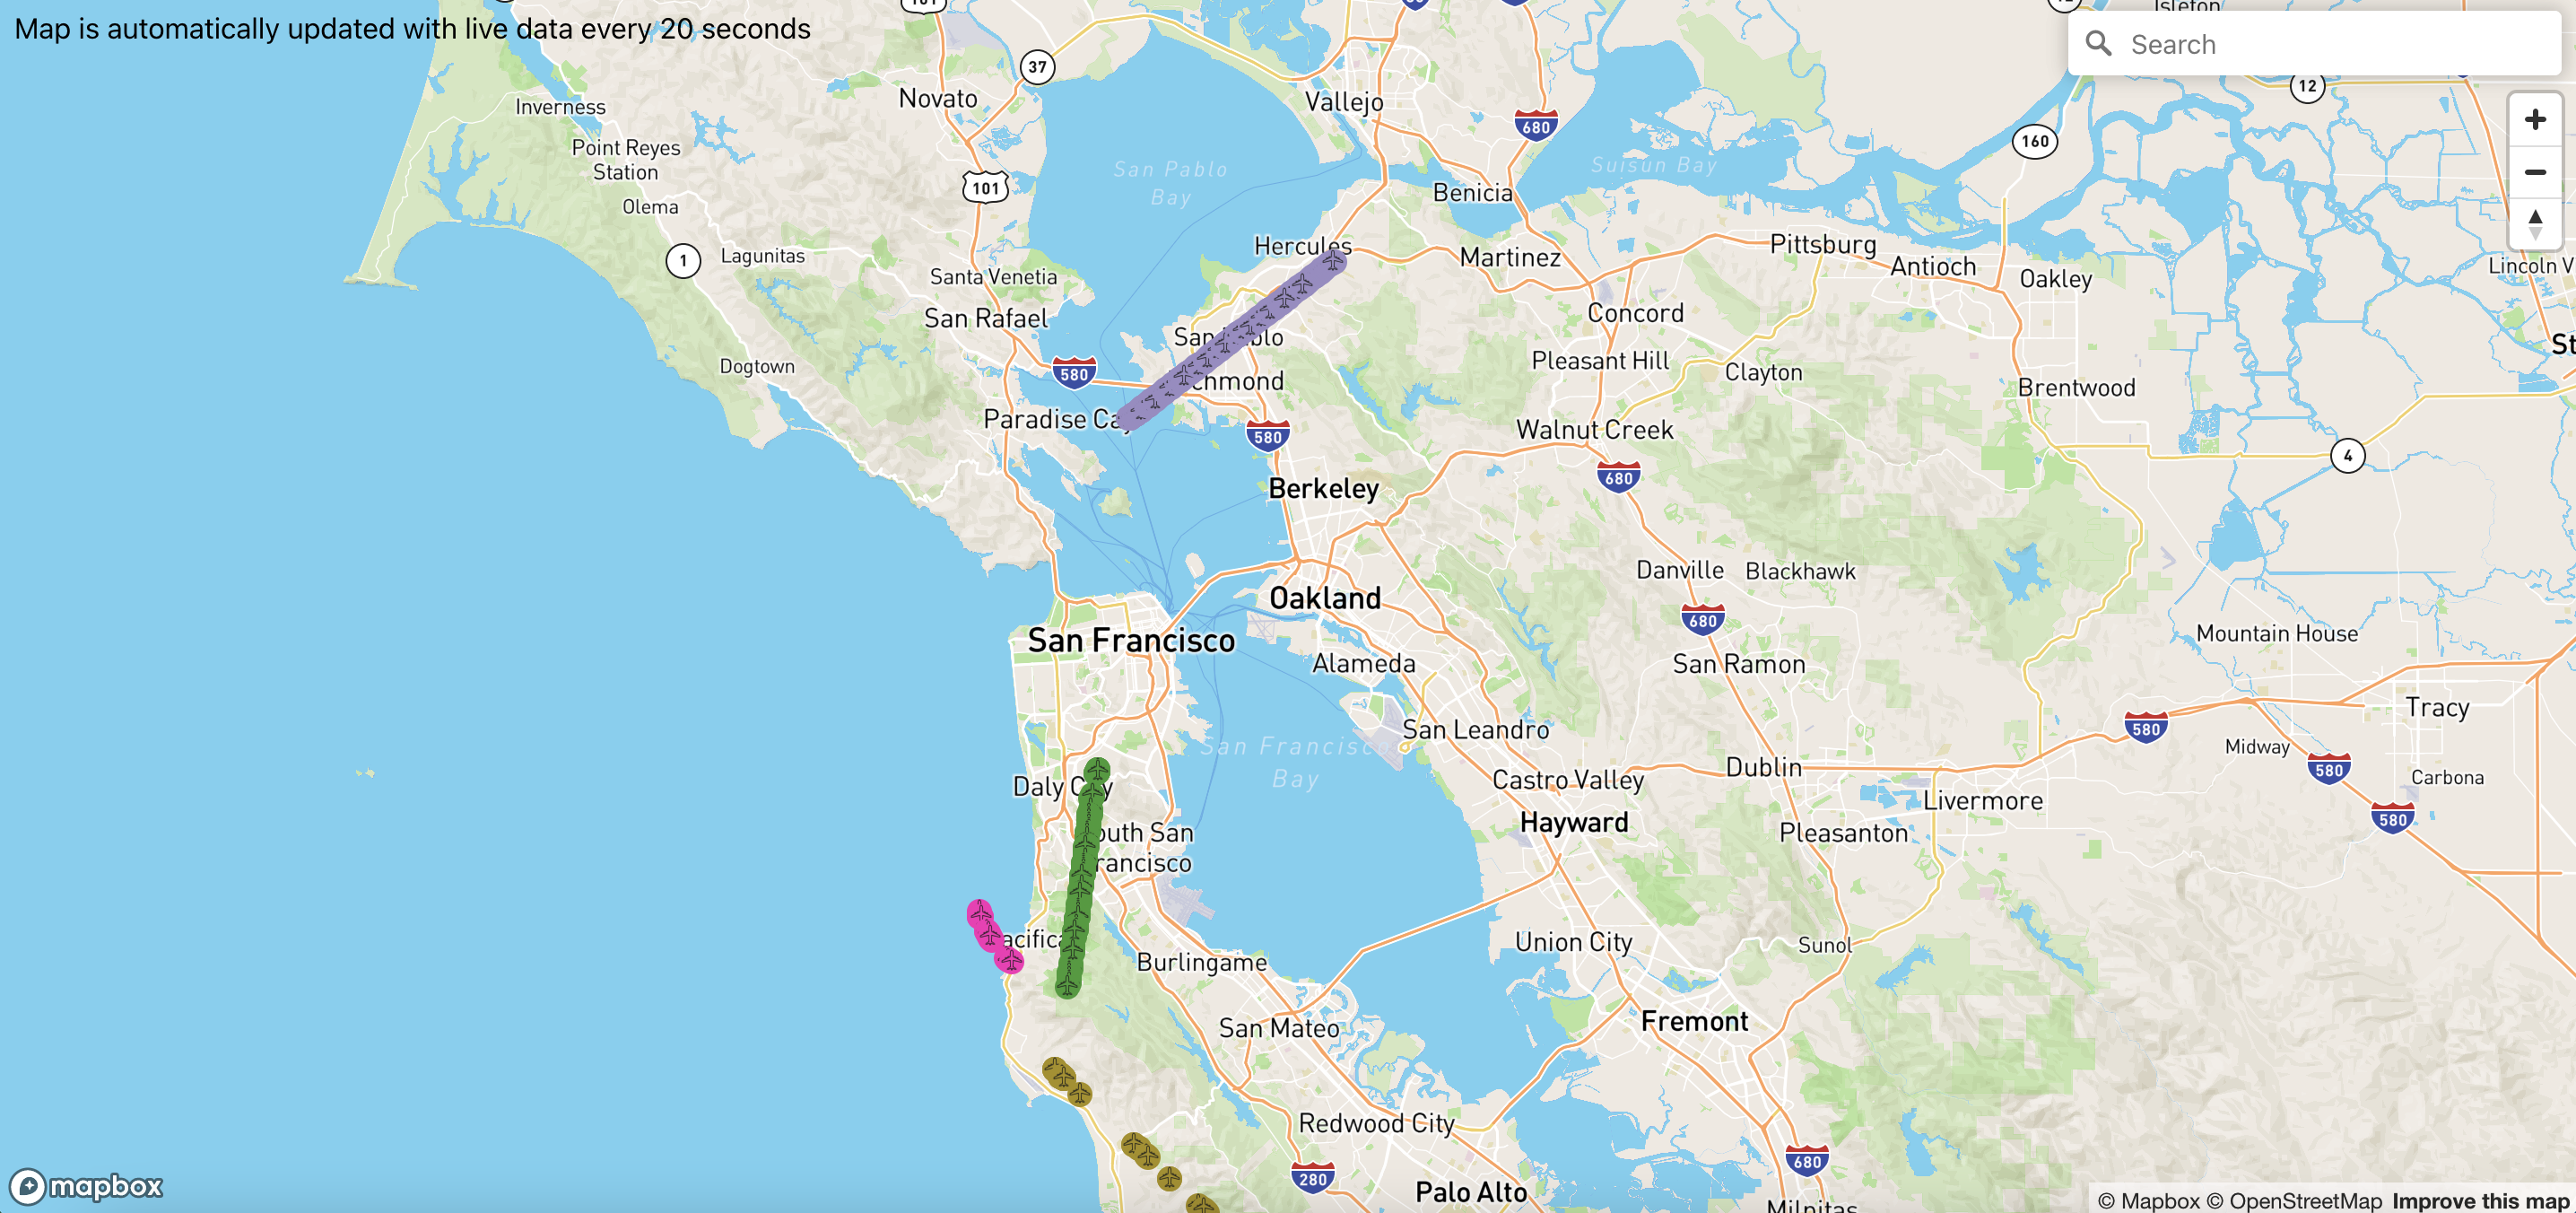
Checkpoint: When you access the app, you can see the map showing up with airplane markers in real time, just like the picture below. You can also see that the markers are updating every 20 seconds.
Deploy the Airplane Tracker app
AWS Amplify provides an easy way for users to deploy the app on a public URL that everyone can access.
To use AWS Amplify to deploy the application, please follow the link below:
https://docs.amplify.aws/start/q/integration/react/
Specifically, you only need to follow these steps:
Log in with your AWS account, and configure the Amplify CLI (https://docs.amplify.aws/start/getting-started/installation/q/integration/react/)
Initialize a new backend, Install Amplify Libraries, and Set up Frontend (You have already done the “Create a new React App” step) (https://docs.amplify.aws/start/getting-started/setup/q/integration/react/)
Checkpoints:
you will see the
amplifyfolder under the<project name>directory.Your
/package.jsonshould have those dependencies with"aws-amplify":{
"dependencies": {
"@mapbox/mapbox-gl-geocoder": "^5.0.1",
"@testing-library/jest-dom": "^5.16.5",
"@testing-library/react": "^13.4.0",
"@testing-library/user-event": "^13.5.0",
"aws-amplify": "^5.2.1",
"axios": "^1.4.0",
"mapbox-gl": "^2.14.1",
"react": "^18.2.0",
"react-dom": "^18.2.0",
"react-scripts": "5.0.1",
"web-vitals": "^2.1.4"
},
}Your
/src/index.jsshould look like the following:import React from 'react';
import ReactDOM from 'react-dom/client';
import './index.css';
import App from './App';
import reportWebVitals from './reportWebVitals';
import { Amplify } from 'aws-amplify';
import awsExports from './aws-exports';
Amplify.configure(awsExports);
const root = ReactDOM.createRoot(document.getElementById('root'));
root.render(
<React.StrictMode>
<App />
</React.StrictMode>
);
// If you want to start measuring performance in your app, pass a function
// to log results (for example: reportWebVitals(console.log))
// or send to an analytics endpoint. Learn more: https://bit.ly/CRA-vitals
reportWebVitals();The app should still work when you run
npm start
Deploy and host the app (https://docs.amplify.aws/start/getting-started/hosting/q/integration/react/)
Checkpoint: After following the instructions in the link, you should get a URL in the form of https://dev.d4a2n7mhawdy0.amplifyapp.com/. You can access the Airplane Tracker through your URL. Now, you have deployed your app!
Future Works
Congratulations, you have created your own Airplane Tracker! Our Airplane Tracker included advanced functionalities, such as searching based on time intervals, sorting by reporter type, etc. You can learn more about these features on the Using our Frontend Airplane Tracker Visualization section. Feel free to check out our application at https://tinyurl.com/specpipe and the corresponding source code at https://github.com/ml4wireless/adsb-nats/tree/master/frontend.
2. Using our Frontend Airplane Tracker Visualization
General Instructions:
- Visit the frontend page: https://tinyurl.com/specpipe
- You can choose to allow your browser to see your location, and then the map should center around your location. Otherwise, the map will center around Berkeley, CA by default.
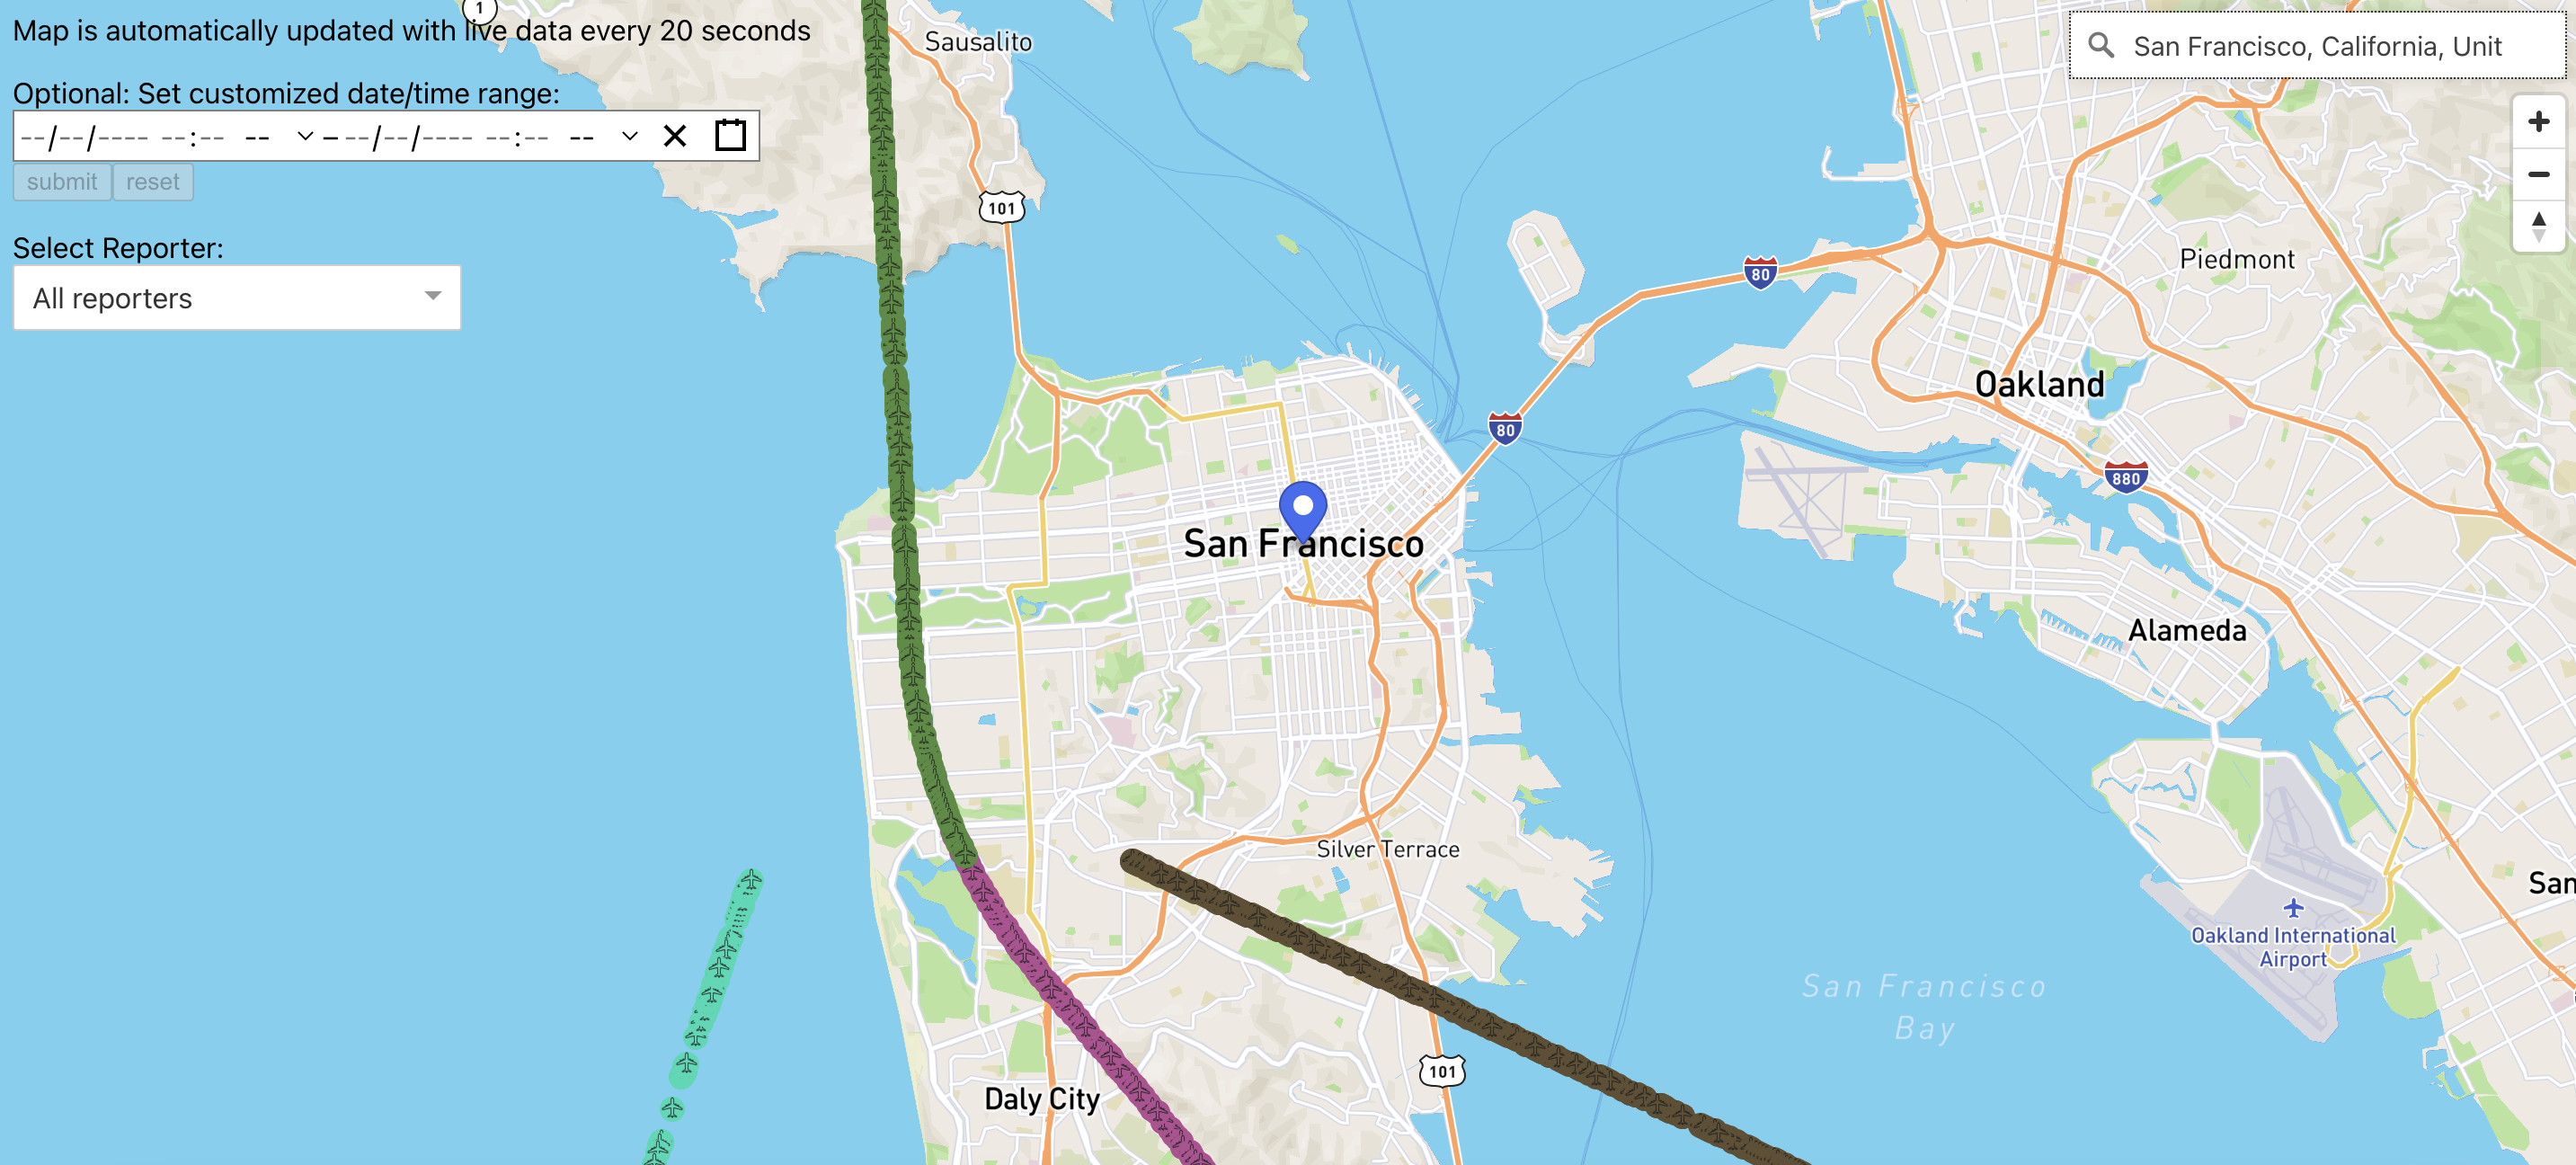
- Every airplane dot/marker on the map represents a logged location at a certain time, with a trail of the same color markers representing a single plane.
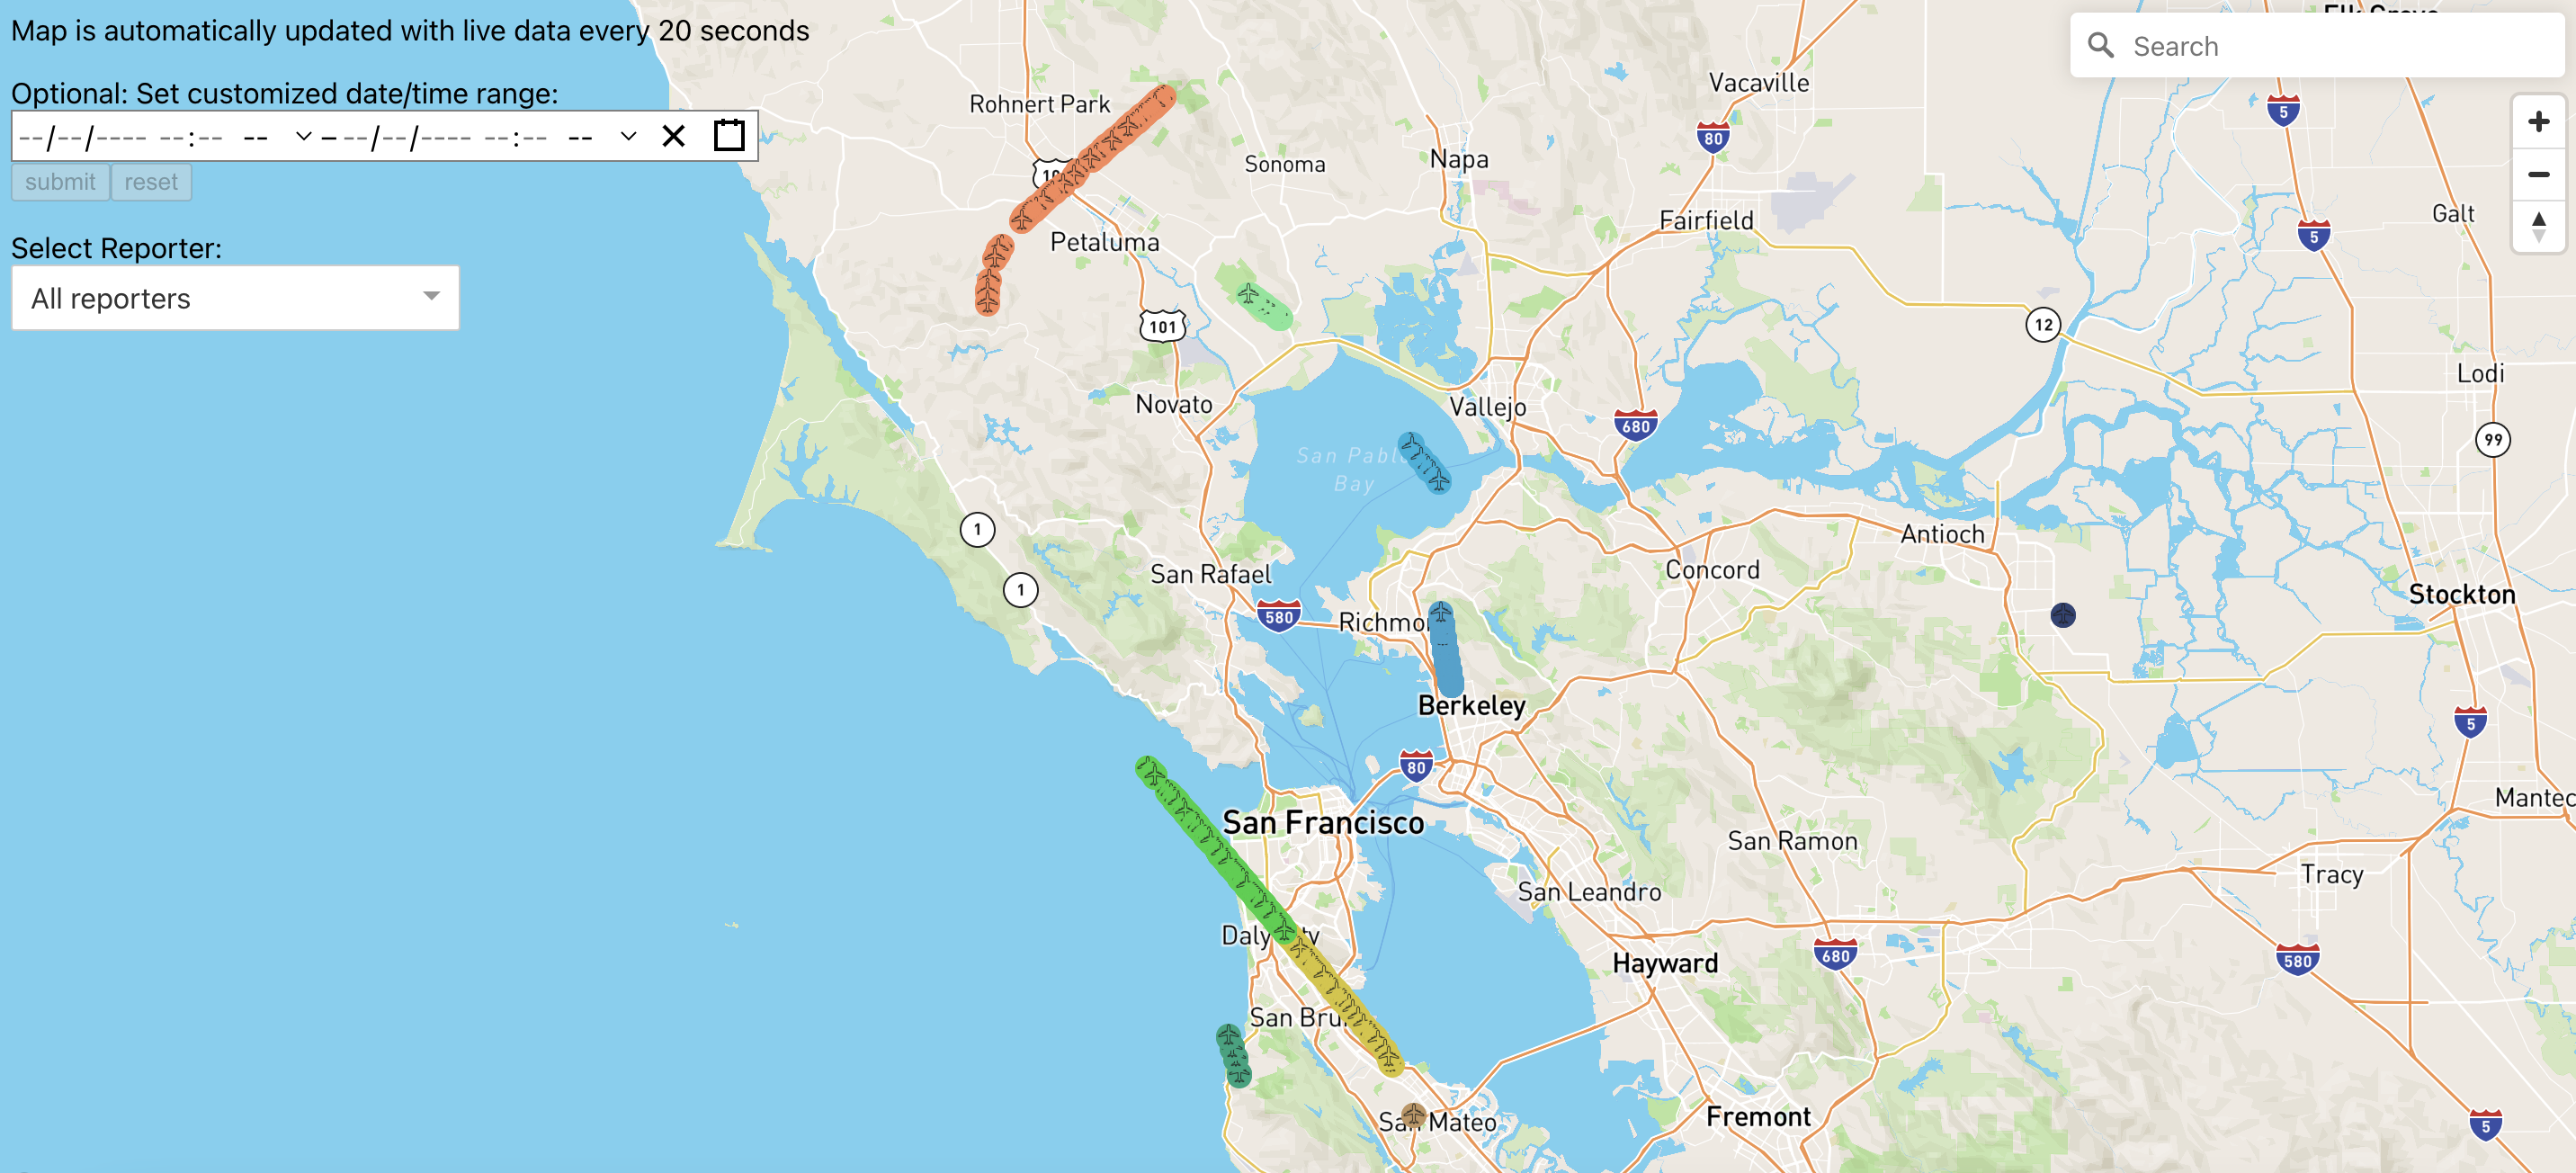
- The Airplane Tracker application updates the map in real time with new airplane data every 20 seconds. The application cleans parts of the data when the number of markers is over a certain limit.
- To test:
Wait and watch for current data points to show up
Should look like the image below after some time has passed
The application also provides additional functionalities.
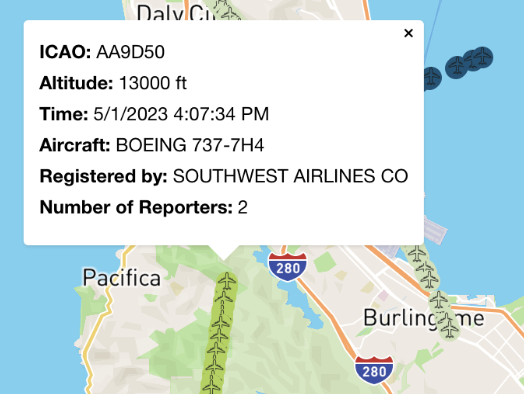
Feature 1: Airplane Marker Popup
As you click on any marker on the map in the Airplane Tracker application, a popup will display additional information such as the airplane’s ICAO number, altitude, time of location broadcast, the aircraft type, etc., as can be seen in the image below.
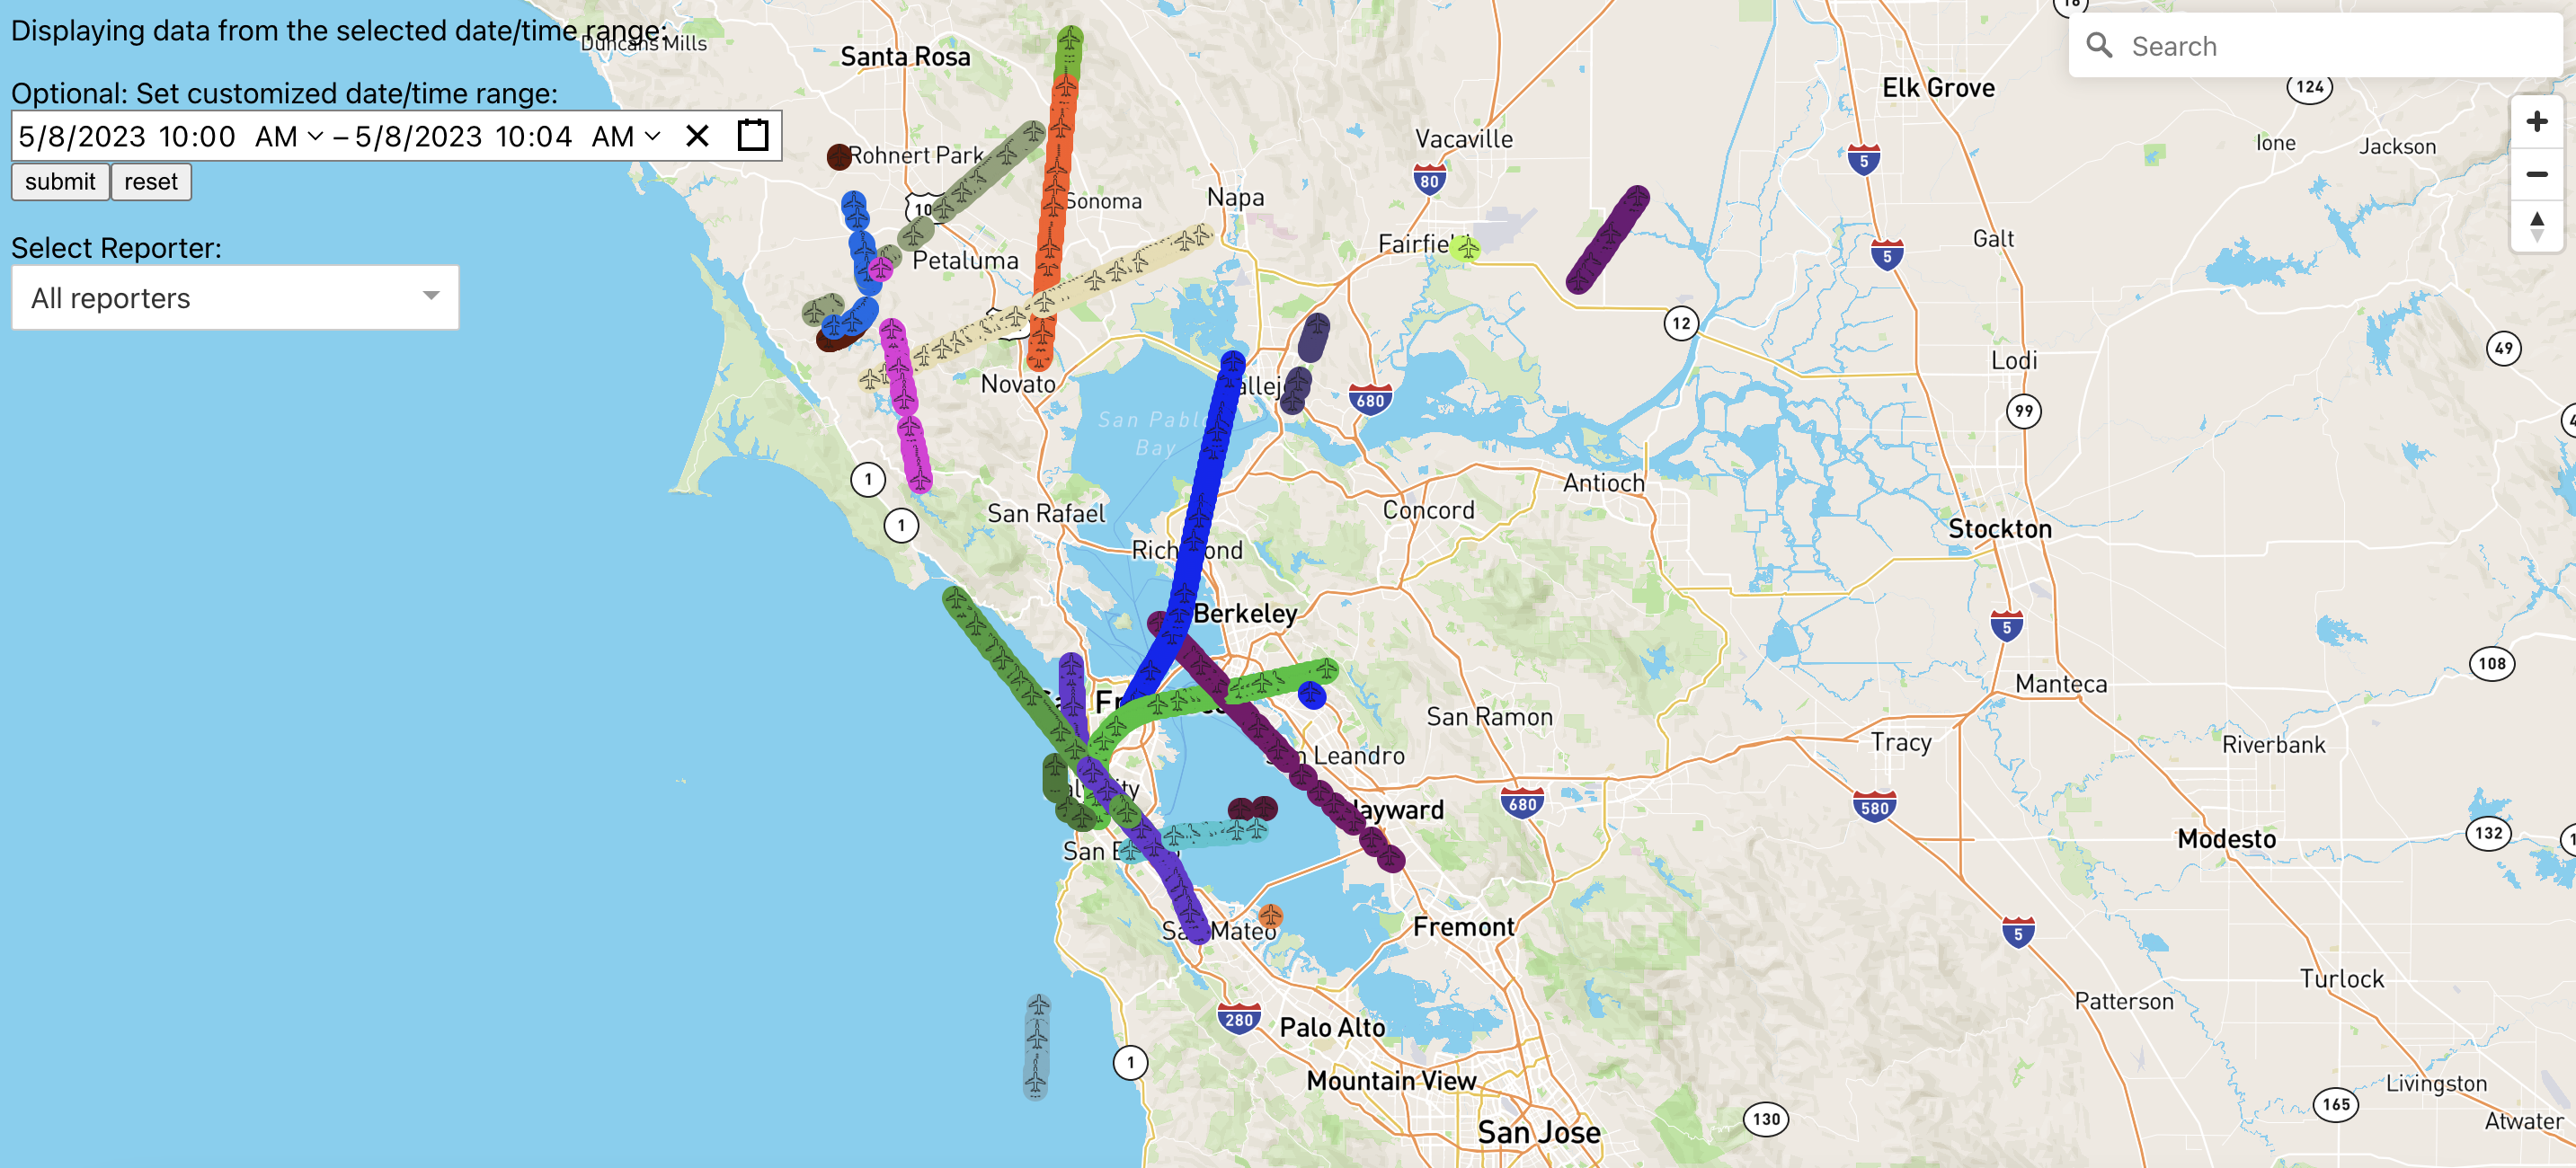
Feature 2: Search Markers based on Time Intervals
- There is an option to select a desired interval and see the plane trajectories during that time range using the calendar tool in the top-left corner of the application.
- In the image shown below, we specified the start time to be 10:00 am on May 8, 2023 and the end time to be 10:04 am on May 8, 2023.
- Make sure to select a max time range of 4 minutes to prevent too many airplane markers
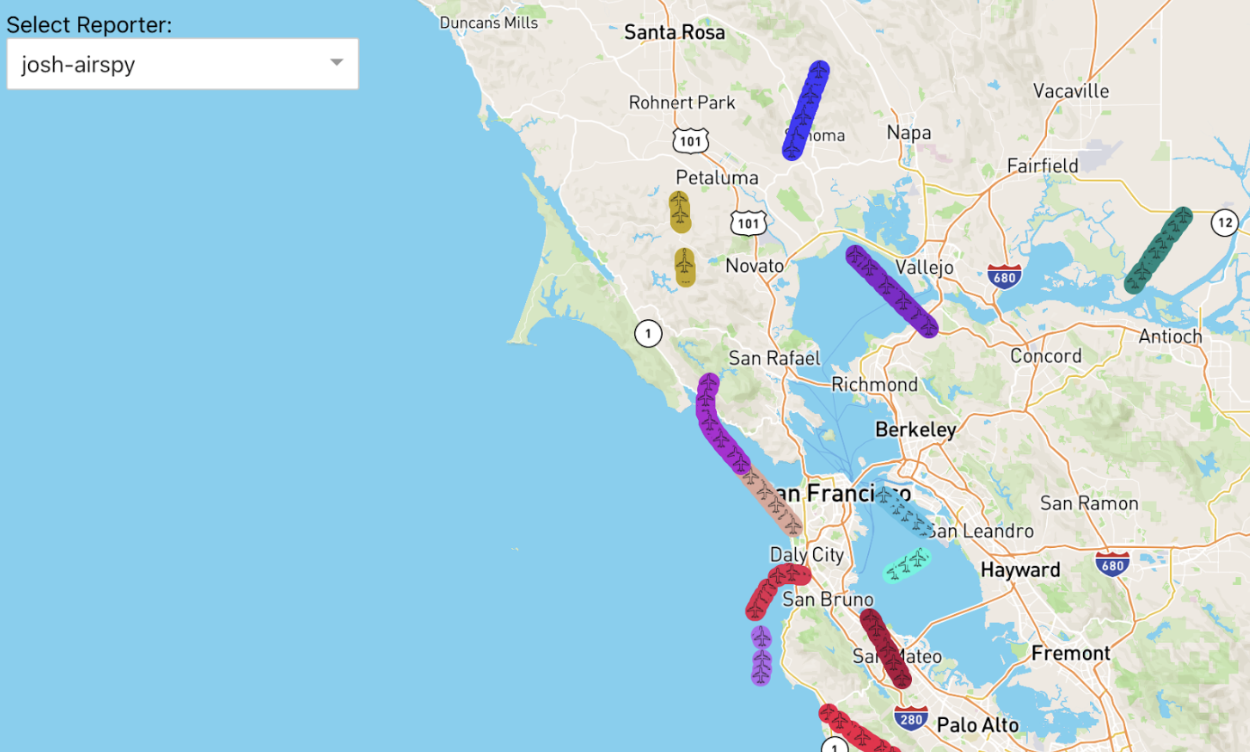
Feature 3: Filter Markers by Reporter
- To distinguish between different reporters, the Airplane Tracker application has a “filter by reporter” functionality using the “Select Reporter” dropdown in the left corner of the application.
- Select a specific reporter under the dropdown, and the application only shows the airplane markers with this reporter type.
Feature 4: Search Markers based on Location
- Using the search box in the top-right corner of the application, users can provide a specific location, and the map will center around the location, just like the image below.
Endnote
In the end, this Airplane Tracker application gives you a glimpse of what we could do with the pipeline and the wireless spectrum radio data. We hope that this could be a motivation for you to develop creative applications using wireless spectrum!